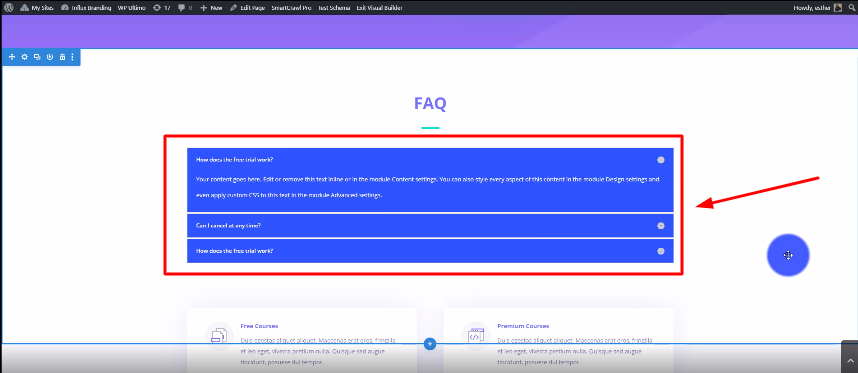
How to change the background color of your website on Influx Plus

How to change the background color
Today, we are going to be showing you how to change the background color of your website on Influx Plus. The background color is very important for making your website stand out.
Step 1: Enable visual builder
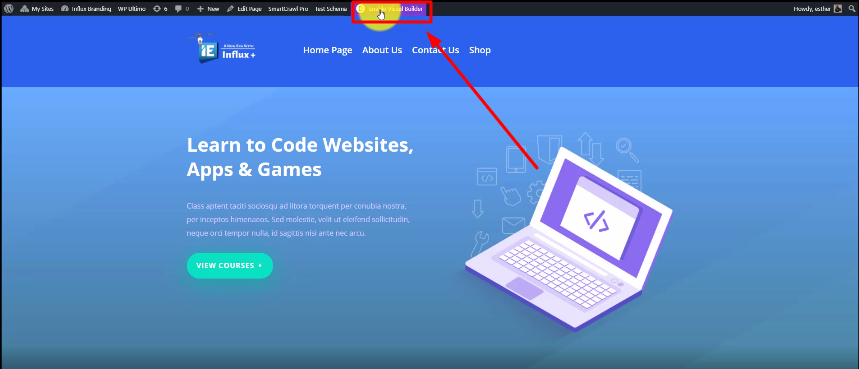
The first thing you need to do is go to the page that you want to add the background color to. Then, click on Enable Visual Builder.
Step 2: Click on the section settings
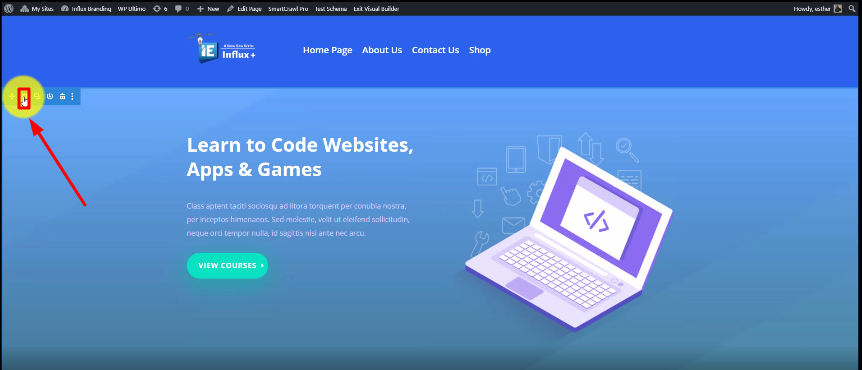
Now, you’re going to click on the blue section settings, in order to be able to change the background color.
Step 3: Click on Background
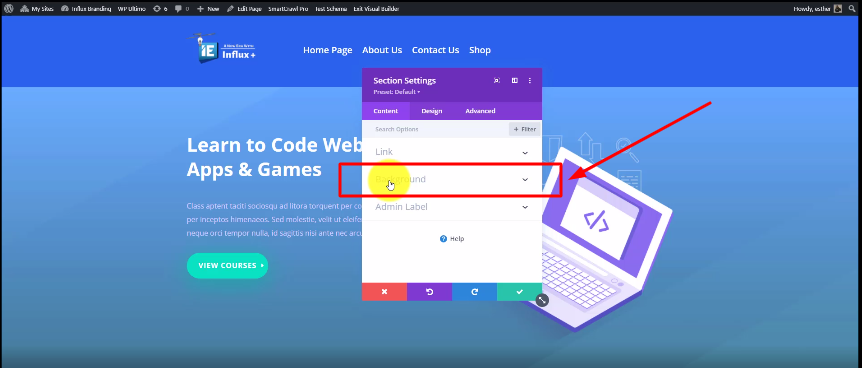
Now, you’re going to click on the background section.
Step 4: For the multicolor background
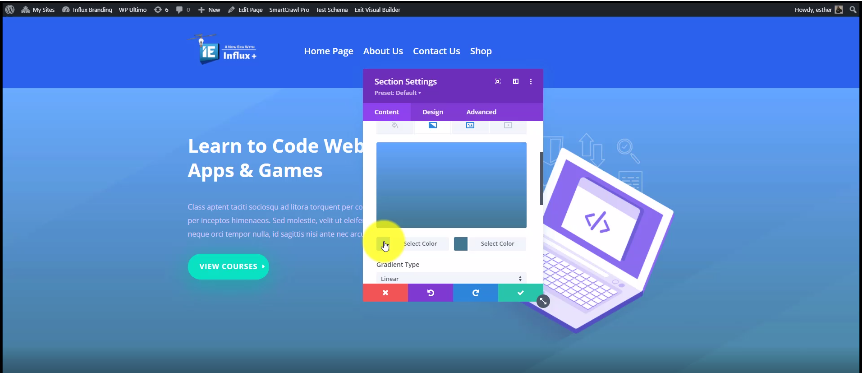
This is for if you want a multi color background. To change the color, clic on Select Color, and choose your color.
Step 5: Delete the multicolor (If you want a solid background)
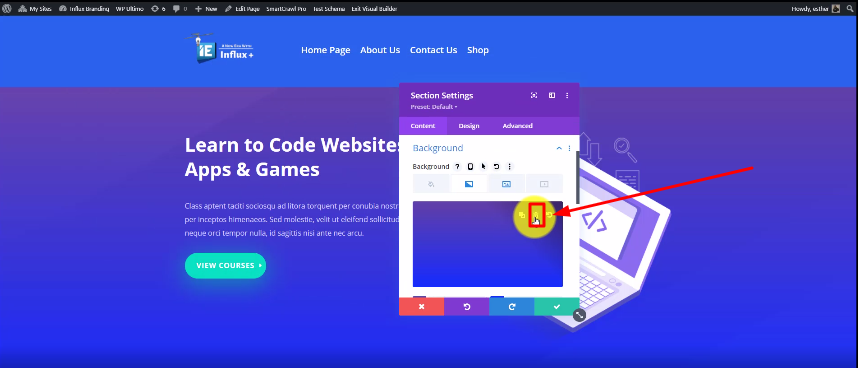
Click on the delete icon if you want to change from a multicolor background to a solid color background.
Step 6: Add the solid color
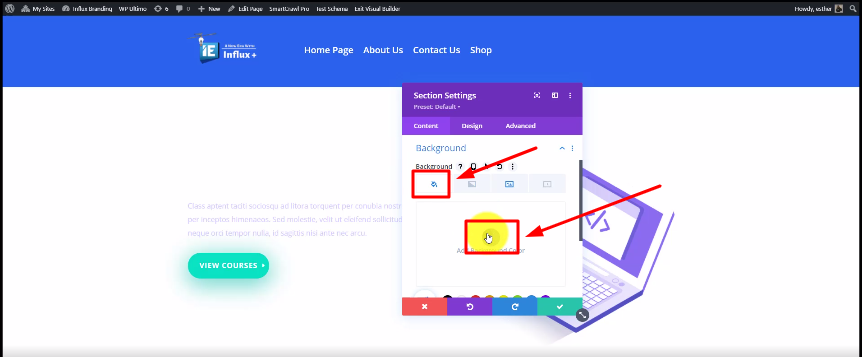
Now, you should click on Add Background Color to add the solid color to your background.
Conclusion
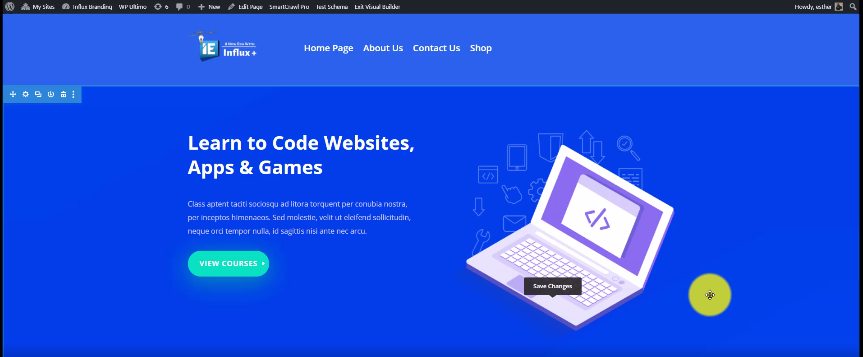
There you guys have it. That was a quick tutorial on how to change the background color of your website on Influx Plus. Thank you guys for watching and we hope you enjoyed this step-by-step tutorial.

How to add spacing to your section on Influx Plus

How to add spacing to your section on Influx Plus
Today, we are going to be showing you how to add spacing to your section on Influx Plus. The spacing adds more space to your section wherever it’s needed.
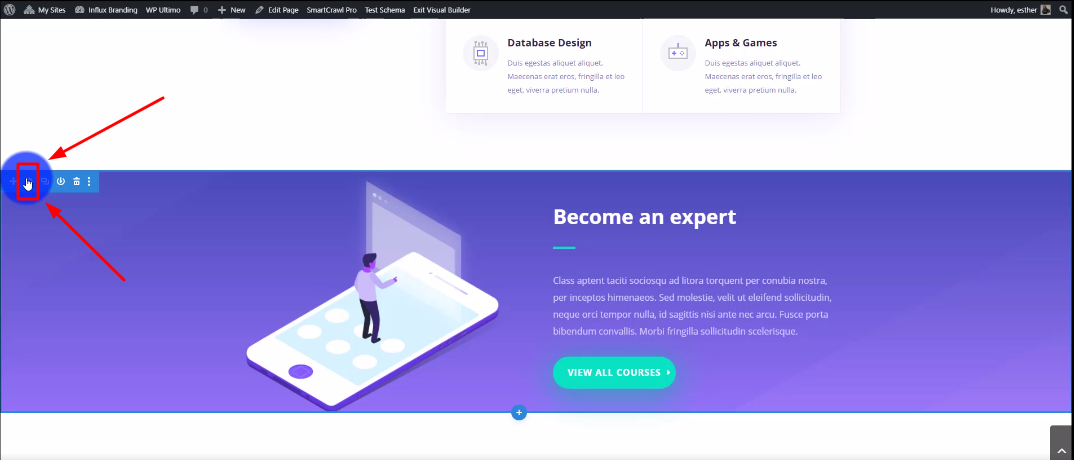
Step 1: Go to your section settings
The first thing you need to do is go to your section settings. To do that, you have to hover over the blue section and click on the settings icon.
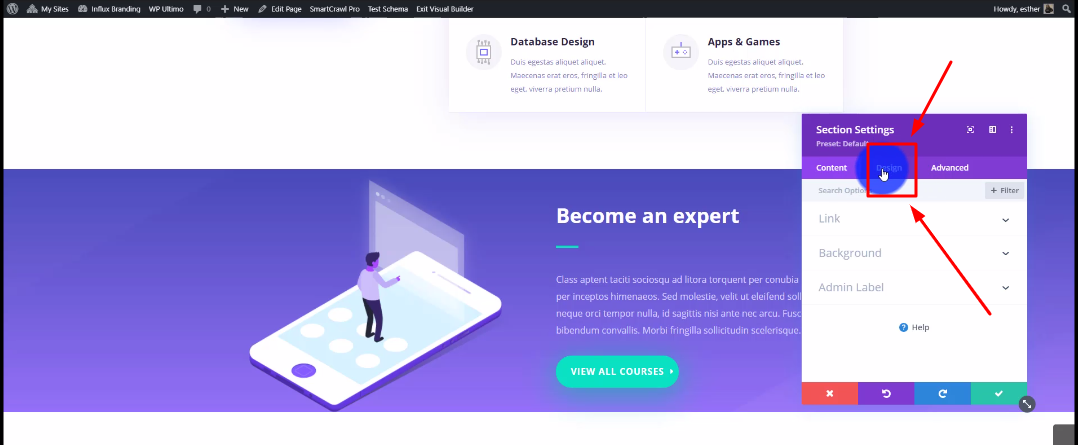
Step 2: Go to the design section
Now, you’re going to go to the top and click on Design. The design section is where you can customize how your section looks.
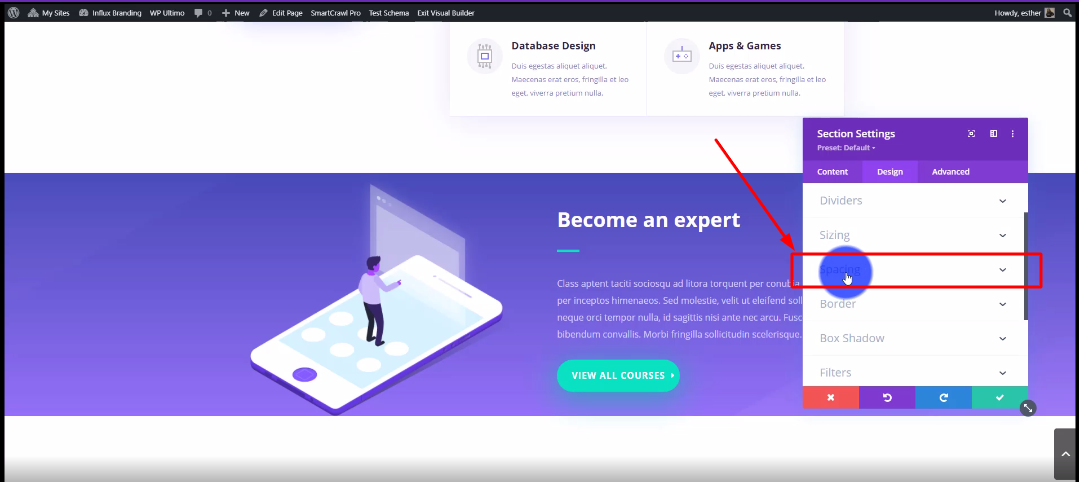
Step 3: Go to the spacing section
Then, you’re going to drag to click on the spacing section like shown in the screenshot above.
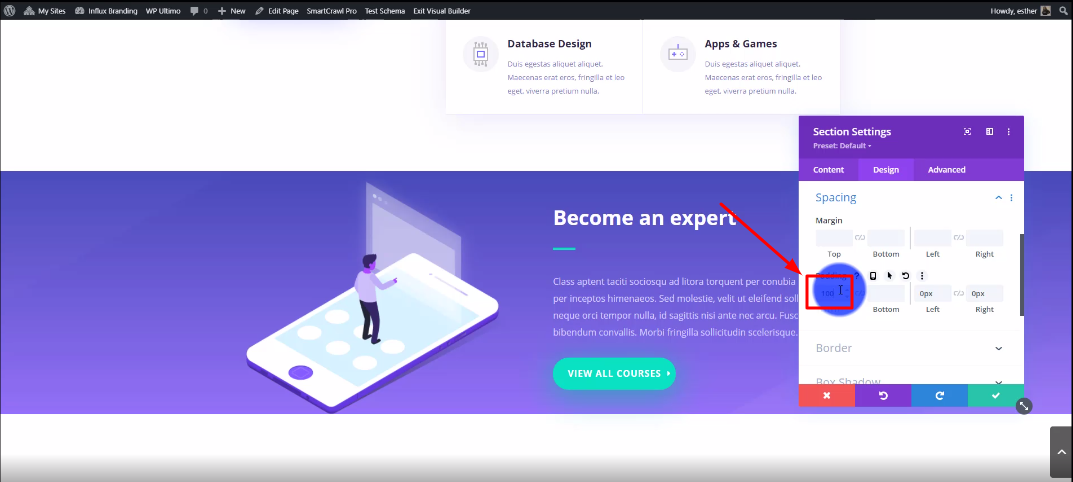
Step 4: Add 100 spacing to the top
In this step, you will need to add 100 spacing to the top under the padding section.
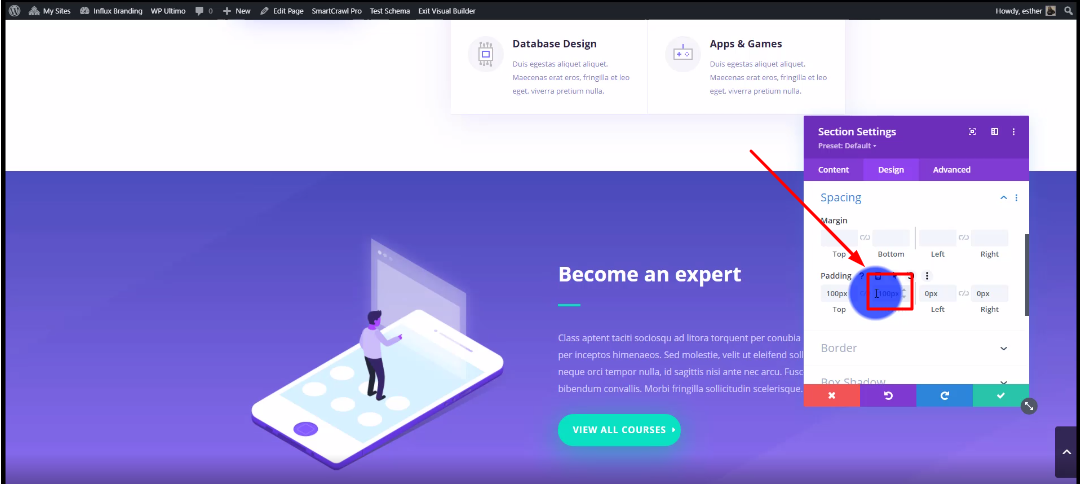
Step 5: Add 100 spacing to the bottom
After that, add 100 spacing to the bottom under the padding section like shown in the screenshot above.
Conclusion
There you guys have it. That was a quick tutorial on how to add spacing to your section on Influx Plus. Thank you guys for watching and we hope you enjoyed this step-by-step tutorial.

How to customize the text on Influx Plus

How to customize the text on Influx Plus
Today, we are going to be showing you how to customize the text on Influx Plus. The text is 100% customizable so you can change it to your liking. You can change the font, text size, text color and even add a text shadow.
Step 1: Go to the text settings
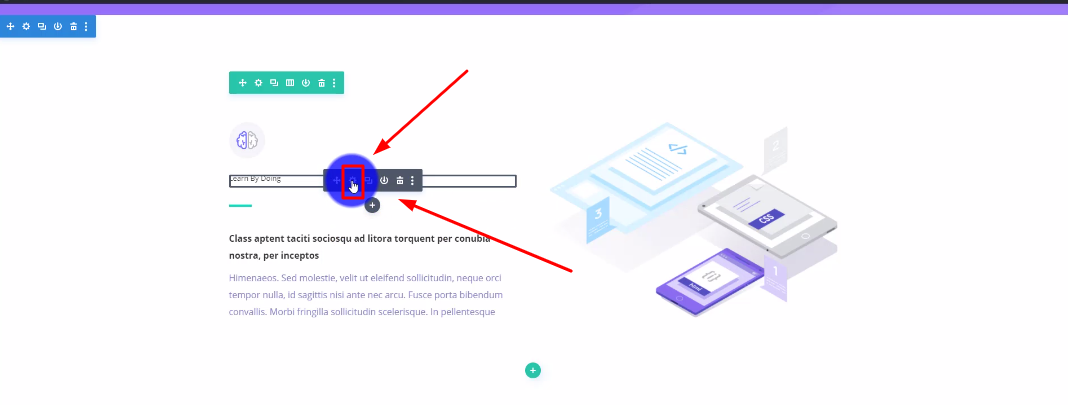
The first thing you need to do is go to the section where you want to customize the text. After that, you are going to go into the text settings by hovering over the text and clicking on the settings icon. Like shown in the screenshot above.
Step 2: Go to the design section
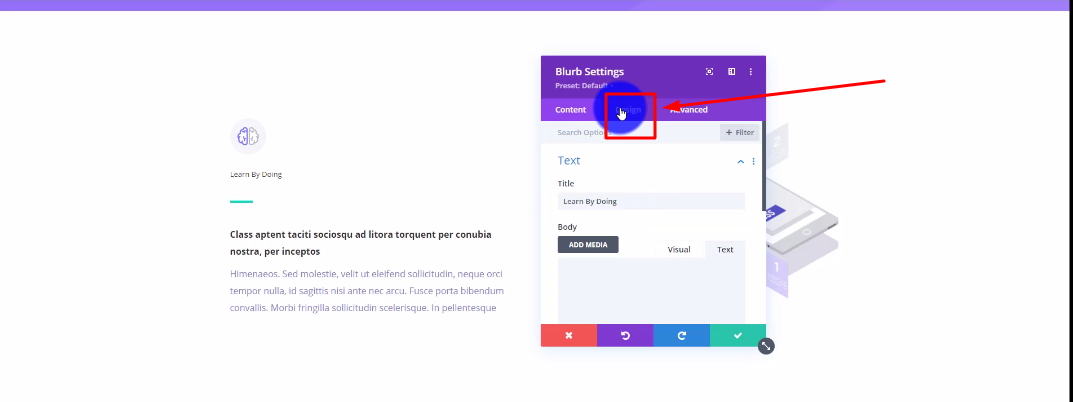
Once the settings are opened up, go to the top and click on Design.The design sectin is where you can customize your text module.
Step 3: Click on Title Text
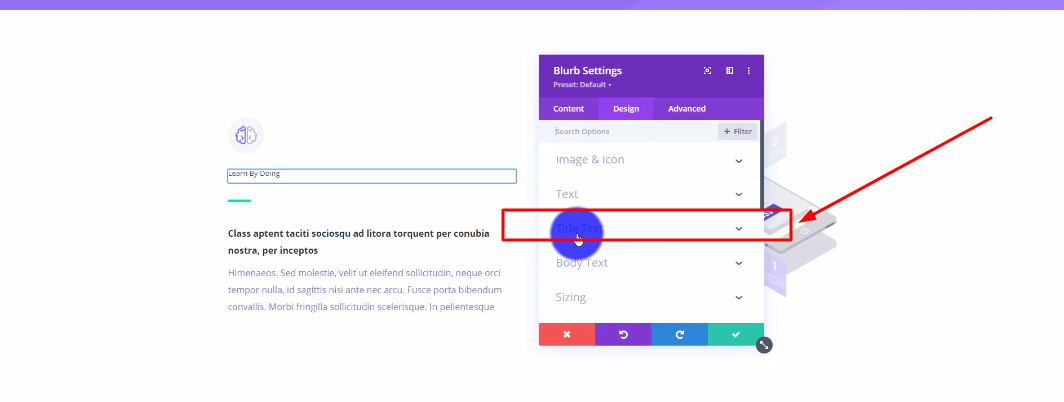
After that, you’re going to click on Title text, to edit the text.
Step 4: Change the font
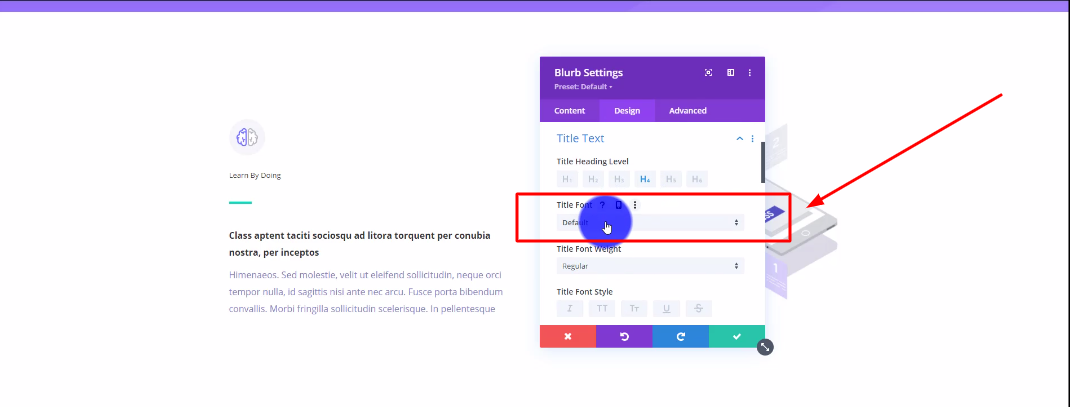
In this step, you can change the font of the text. There are a variety of options to choose from. You can even upload your own font if you want as well.
Step 5: Change the font weight
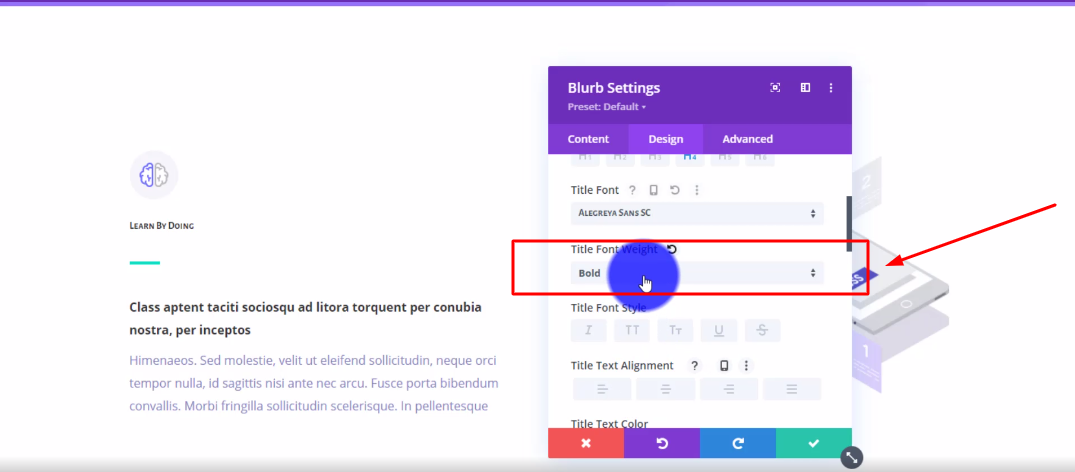
In this stepm, you can change the font weight to your liking. You can make it Bold, Ultra bold, regular or thin.
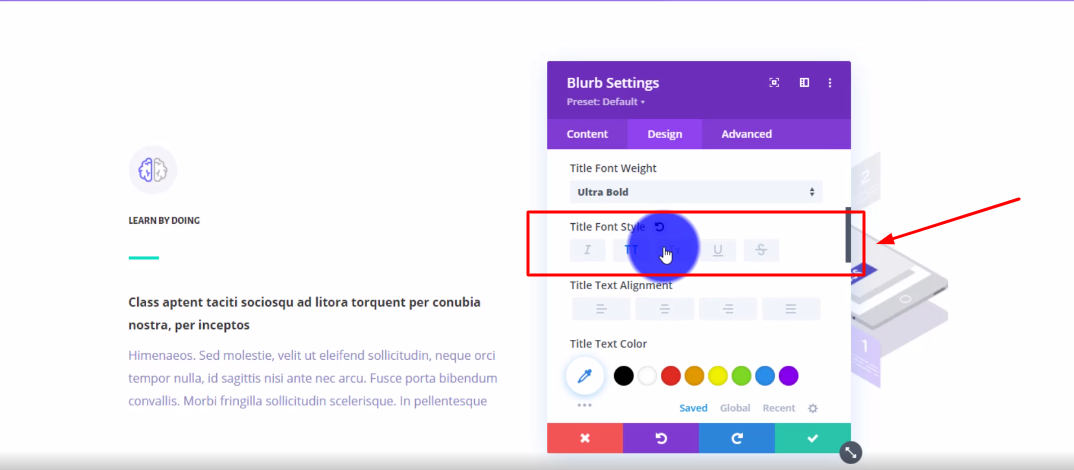
Step 6: Change the font style
Now, you can change the font style. You can make the text italicized, underlined, capitalized and even with a line through the text.
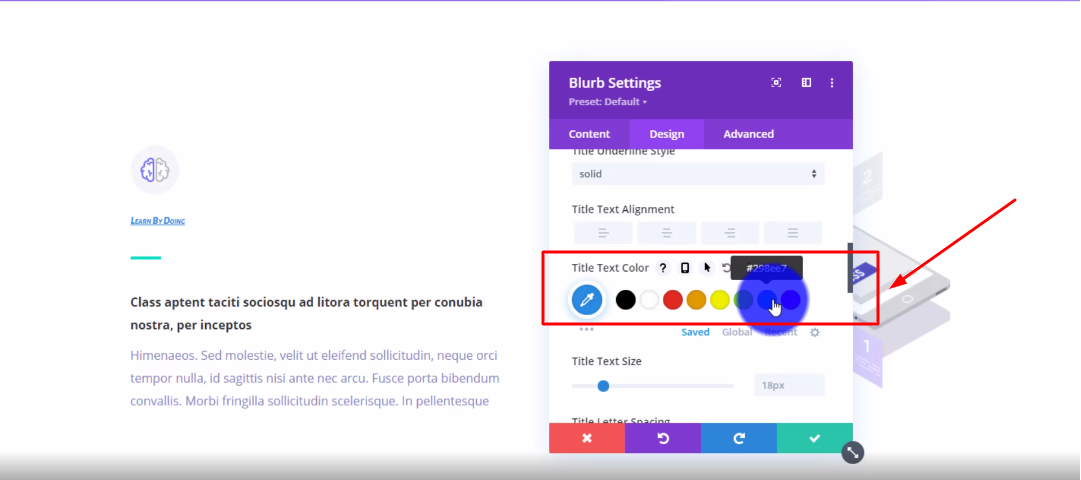
Step 7: Change the text color
Here, you’re able to change the text color. You can either choose from the preset colors or you can click on the icon to choose a custom color.
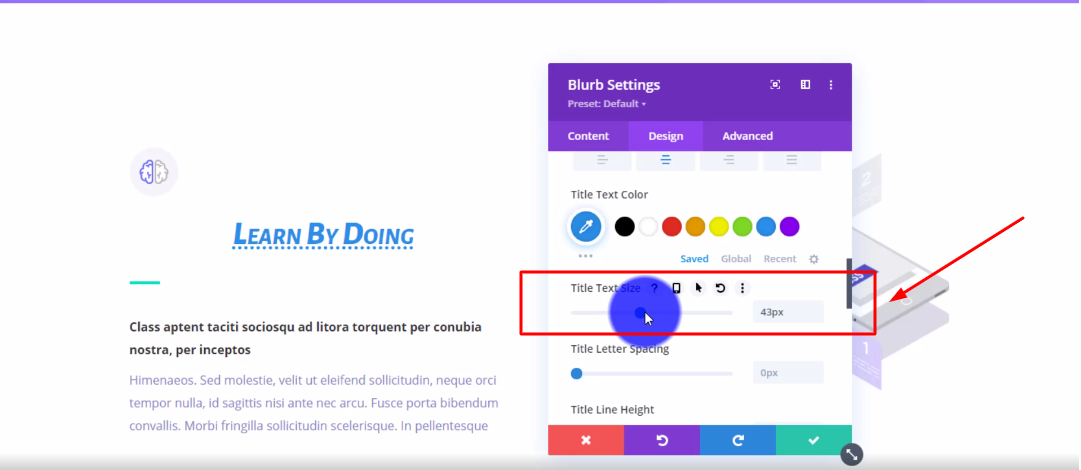
Step 8: Change the text size
You can make the text size as big or as little as you want, in this step.
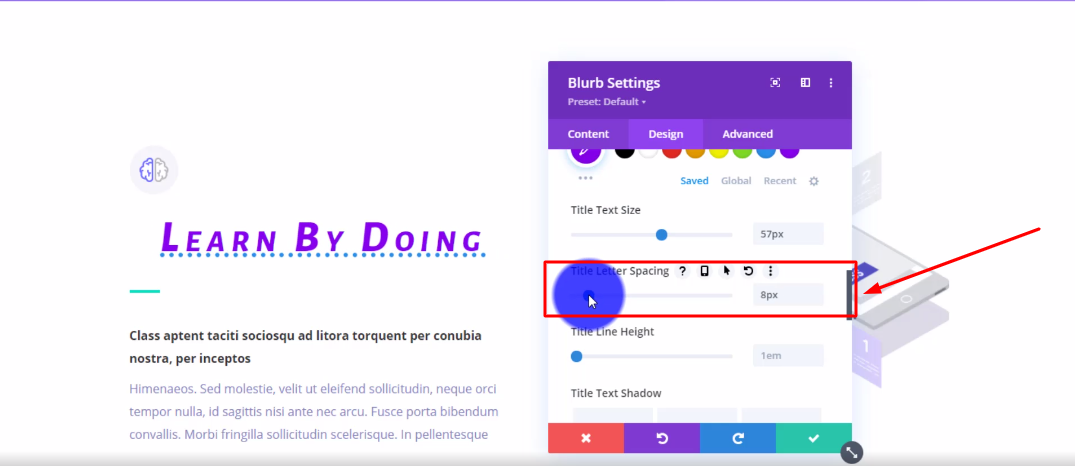
Step 9: Change the letter spacing
In this step you can change the letter spacing to your liking. The letter spacing makes the letters more spaced out.
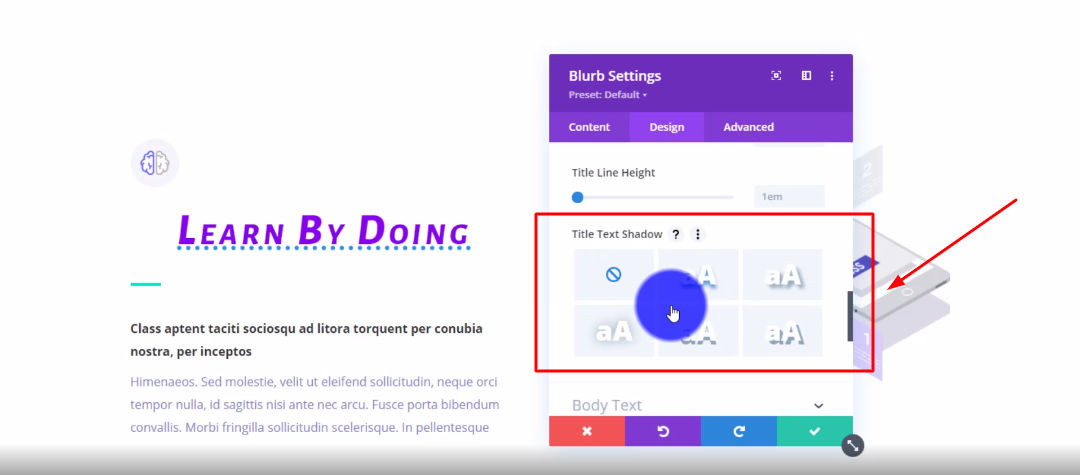
Step 10: Change the text shadow
There are 6 different text shadow options that you can choose from. Pick one that you like.
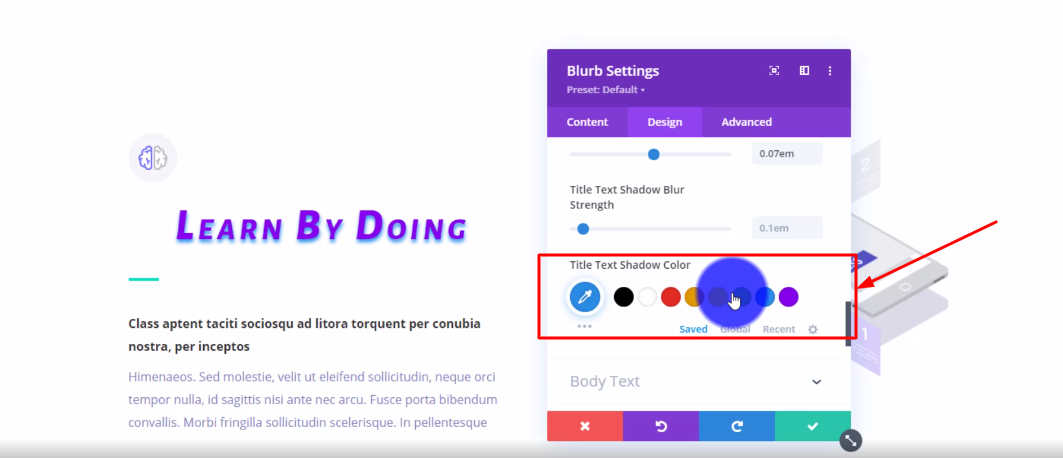
Step 11: Change the text shadow color
You can change the text shadow color to your liking. Pick a color that you think will compliment the text color.
Conclusion
There you guys have it. That was a quick tutorial on how to customize the text on Influx Plus. Thank you guys for watching and we hope you enjoyed this step-by-step tutorial.

How to add and customize the toggle module on Influx Plus

How to add/customize the toggle module
Today, we are going to be showing you how to add and customize the Divi’s toggle module on Influx Plus. The toggle can be used to display questions and answers. It can be used as a part of any FAQs section or page.
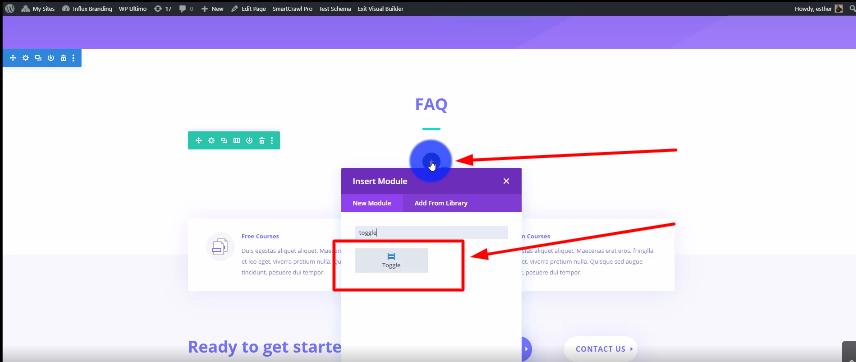
Step 1: Add the toggle module
The first thing you need to do is go to the section where you want to add the toggle. Then, click on the grey plus icon and type in Toggle. After that, you’re going to click on the toggle module like shown in the screenshot above. **If you are not a part of the network, join us by going to www.InfluxEntrepreneur.com**
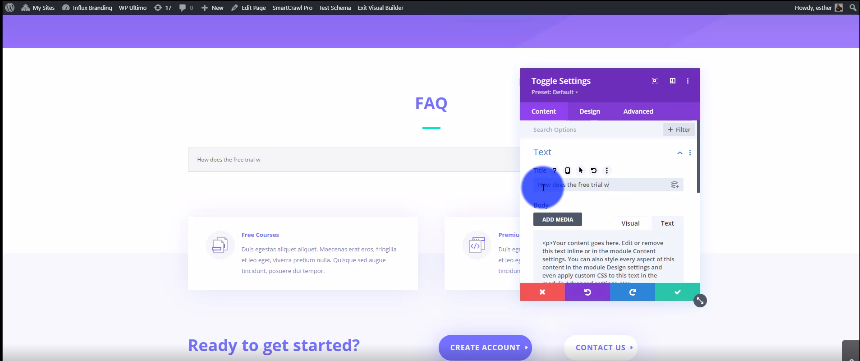
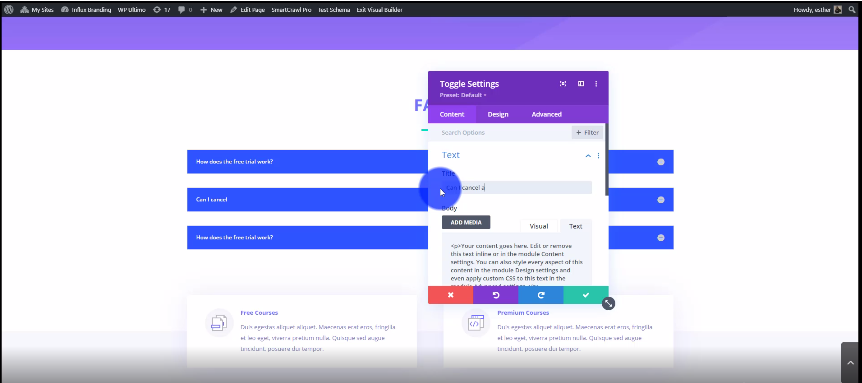
Step 2: Add the information
Now, you’re going to add the information that you want. Add the question in the Title area. Then, add the answer in the Body Text area. Please use the screenshot above as reference.
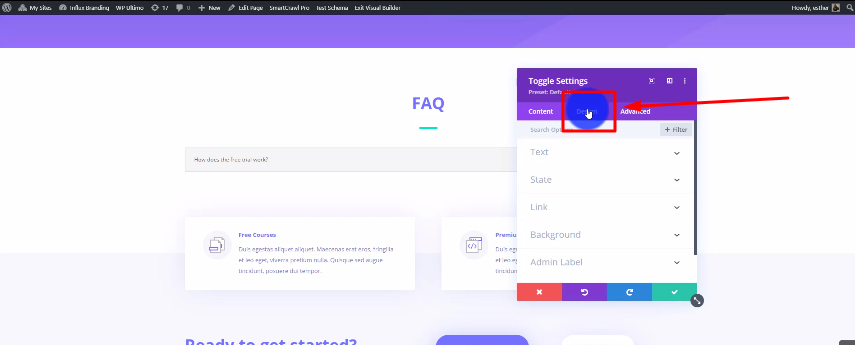
Step 3: Head over to design
After that, you need to go to the design section of the toggle.
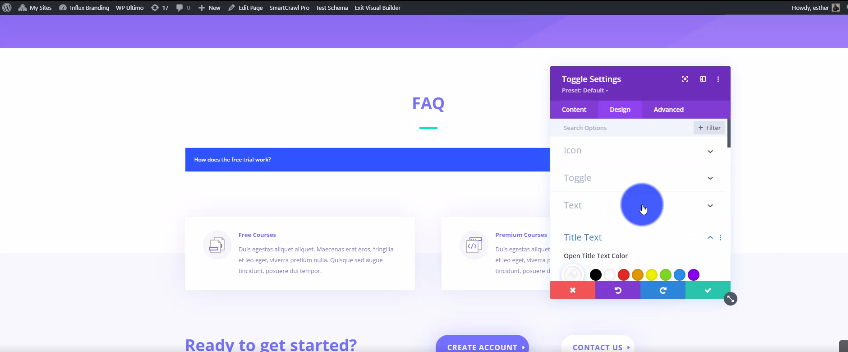
Step 4: Start customizing
In this step, you will be customizing your toggle to your liking. You can change the toggle box color, the text color, and size, and even the icon color.
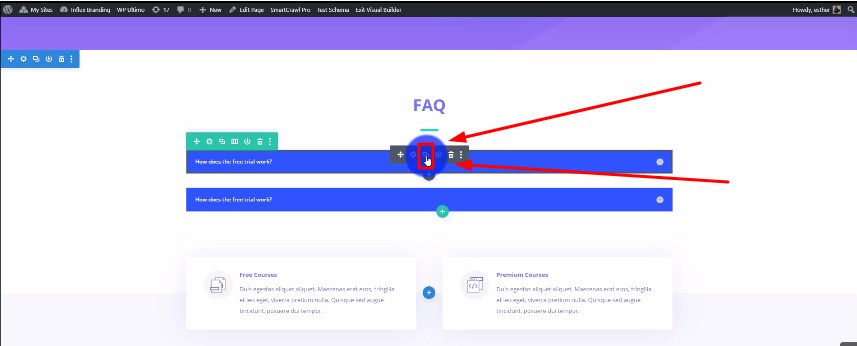
Step 5: Duplicate the toggle
Once you are done customizing, you can duplicate the toggle as many times as you want. Each toggle will display a question and answer.
Step 6: Repeat steps 2-4 for the other toggles
Now, it’s time for you to repeat steps 2-4 for the other toggles that you want to add to your page.
Conclusion
There you guys have it. That was a quick tutorial on how to add and customize Divi’s toggle module on Influx Plus. Thank you guys for watching and we hope you enjoyed this step-by-step tutorial.
How to add and customize the pricing table module on Influx Plus

How to add and customize the pricing table module
Today, we are going to be showing you how to add and customize the Divi pricing table module on Influx Plus. A pricing table is important when you are offering multiple packages for things like memberships.
Step 1: Add the pricing table module
The first thing you need to do is log in to your website. Then, go to the section where you want to add the pricing table to. After that, you’re going to click on the grey plus icon and type in “pricing table” as shown in the screenshot above. **If you are not a part of the network, join us by going to www.InfluxEntrepreneur.com**
Step 2: Add the information
Now, you’re going to fill in the information that you want to include in your pricing table. Add the title, subtitle, pay frequency, and description.
Step 3: Head over to design
Then, you’re going to look on the top and click on Design to start customizing your pricing table.
Step 4: Start designing your pricing table
After that, you can start to customize your pricing table. You can customize the Title text, the subtitle text, the button, and the body text.
Step 5: Duplicate the module
Now head back o0ver to the content settings and click on the icon that is shown in the above screenshot, to duplicate the pricing table. Click on it twice.
Step 6: Go into the settings
Now you’re going to click on the settings con for the 2nd pricing table, in order to customize it.
Step 7: Repeat steps 2-4 for both pricing tables
Now, you’re going to repeat steps 2-4 for both pricing tables. You can customize each pricing table to your liking.
Conclusion
There you guys have it. That was a quick tutorial on how to add and customize the Divi pricing table module on Influx Plus. Thank you guys for watching and we hope you enjoyed this step-by-step tutorial.