How To Add A Global Header Using Divi on Influx Plus
Hey Team Influx, today we are going to be showing you guys how to add a global header using Divi on Influx Plus. Please watch this quick and simple step-by-step on how to add a global header to your website using Divi on Influx Plus.


The first thing you’re going to do is log in to your dashboard. If you are not a part of the influx network join by clicking here
Step 2: Go to Theme Builder
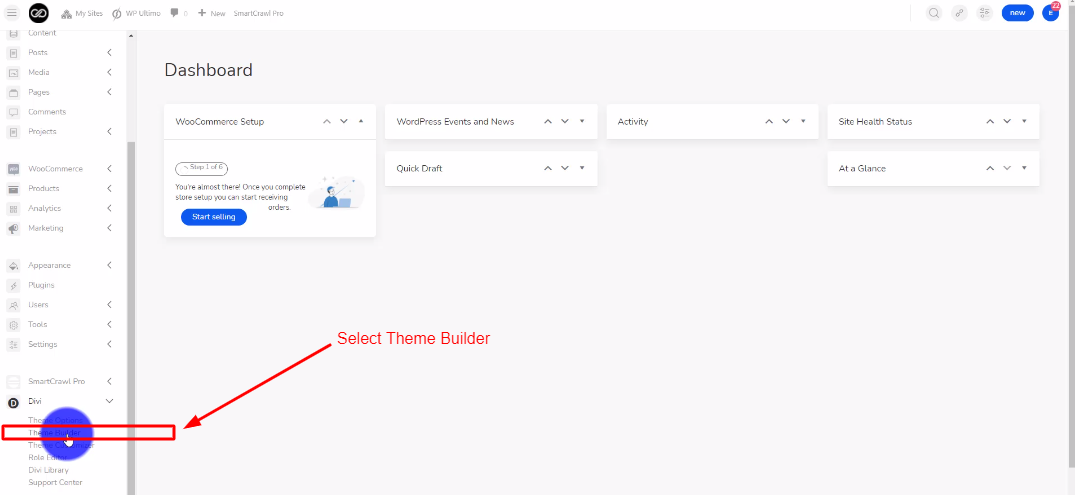
The next thing you’re going to do is go to Divi and select Theme Builder.
Step 3: Click on Add Global Header
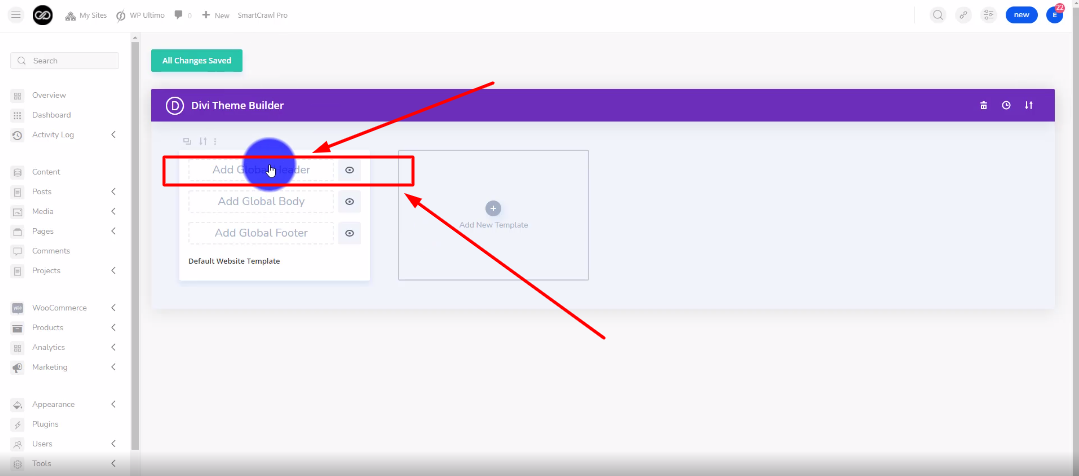
The next thing you’re going to do is click on Add Global Header. Then click on Build Global Header.
Step 4: Select Build From Scratch
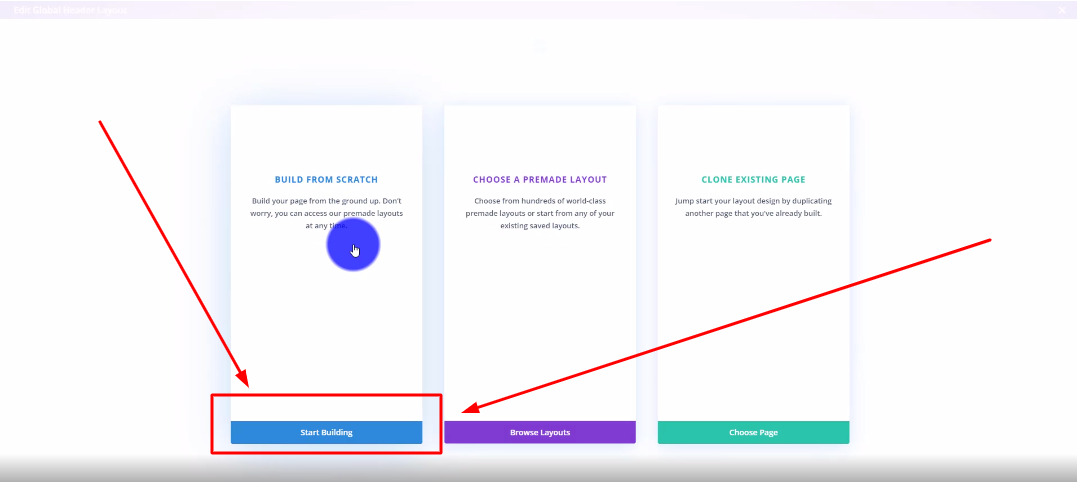
There are 3 options to choose from. Choose the Build From Scratch option by clicking on Start Building.
Step 5: Choose your row style
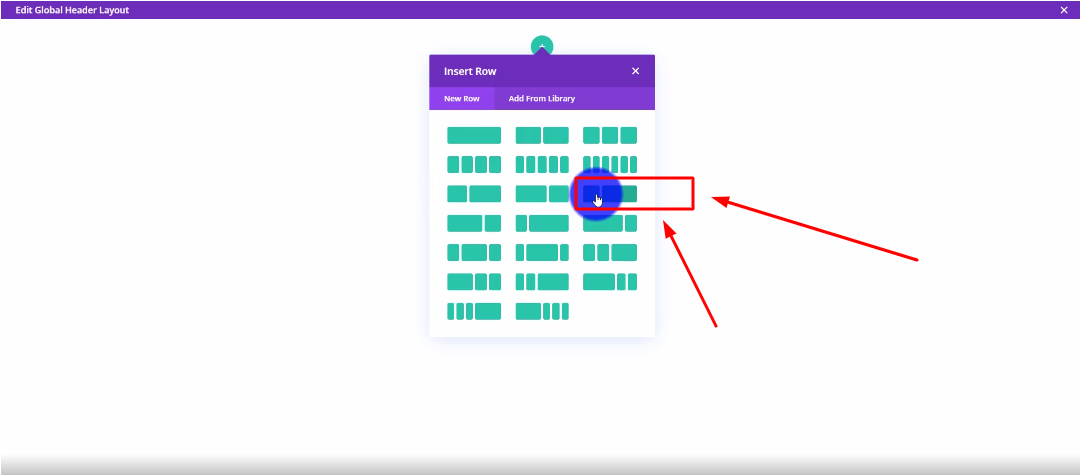
Now you’re going to choose your row style.
Step 6: Customize to your liking
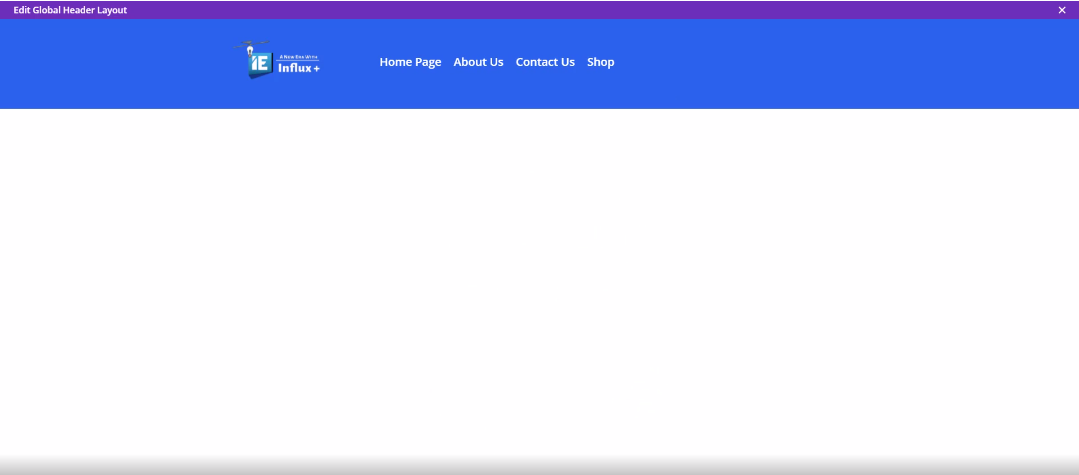
Now, customize the header to your liking. I added an image module on the left, and a menu module to the right.
Step 7: Save Changes
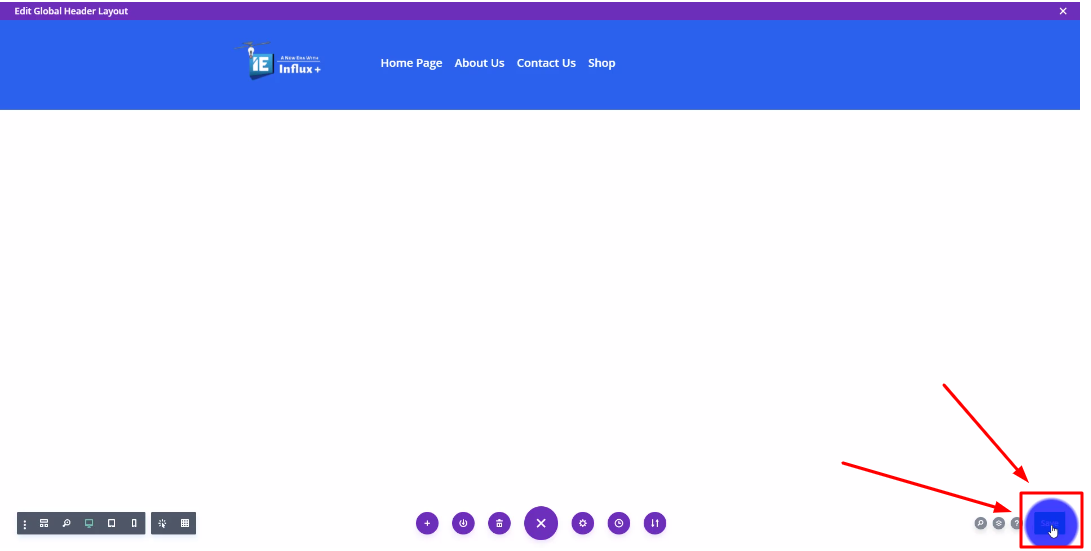
Now Save your changes. Then Exit
Step 8: Save Changes Again
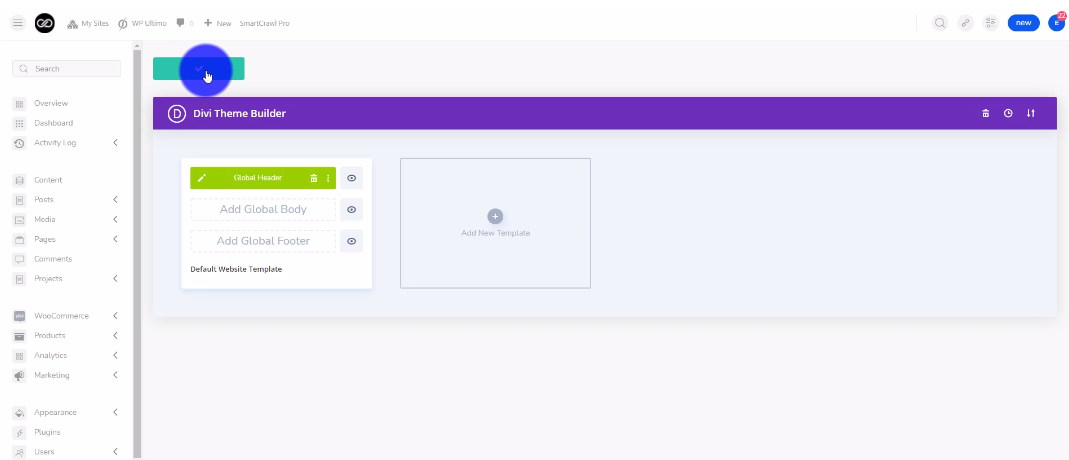
Save your changes again by clicking the green button.
There you guys have it. That was a quick tutorial on how to add a global header using Divi on Influx Plus. To Join influx plus click here
