How To Add A Live Chat Option Using HubSpot on the Influx Plus Network
Hey Team Influx, today we are going to be showing you guys how to add a live chat option using HubSpot on the Influx Network. Please watch this quick and simple step-by-step on how to connect live chat option using HubSpot on the Influx Network.


The first thing you're going to do is log in to your dashboard. If you are not a part of the influx network, you can join by clicking here.
Step 2: Enable HubSpot
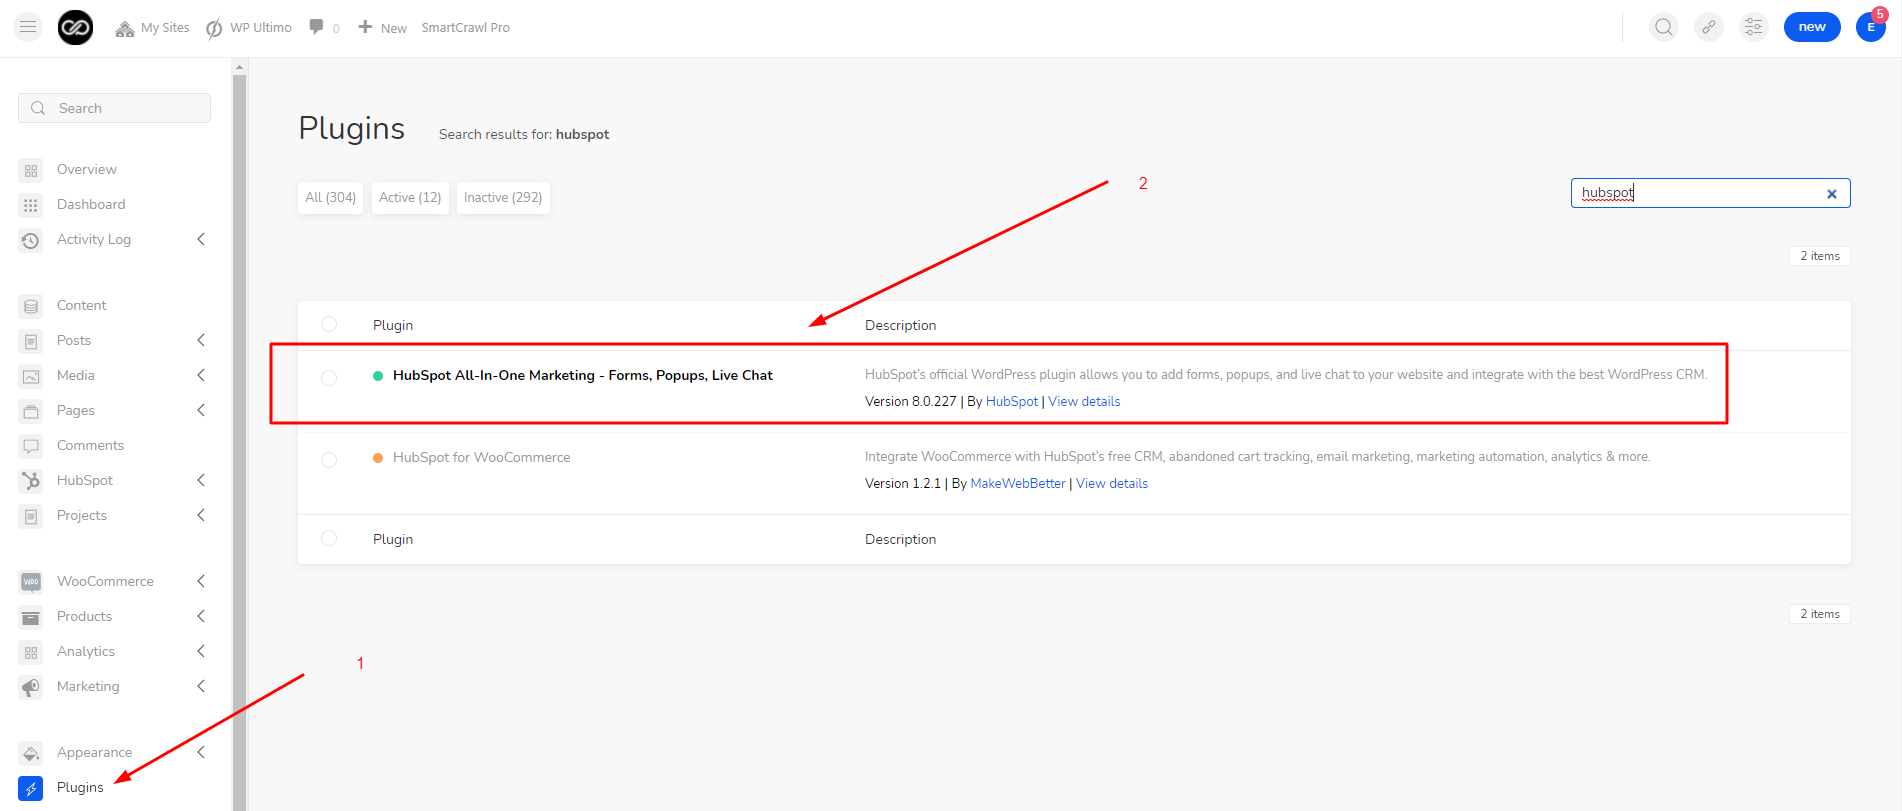
The next thing you're going to do is go to your Plugins. Once you are on there search for HubSpot & click on activate
Please keep in mind that the Influx Network already has these plugins installed for you If you aren't on our network then you will have to download those plugins from WooCommerce.
Step 3: Go To HubSport Live Chat Settings

The next thing you're going to do is go to HubSpot and click on Live Chat.
Step 4: Style your Chat
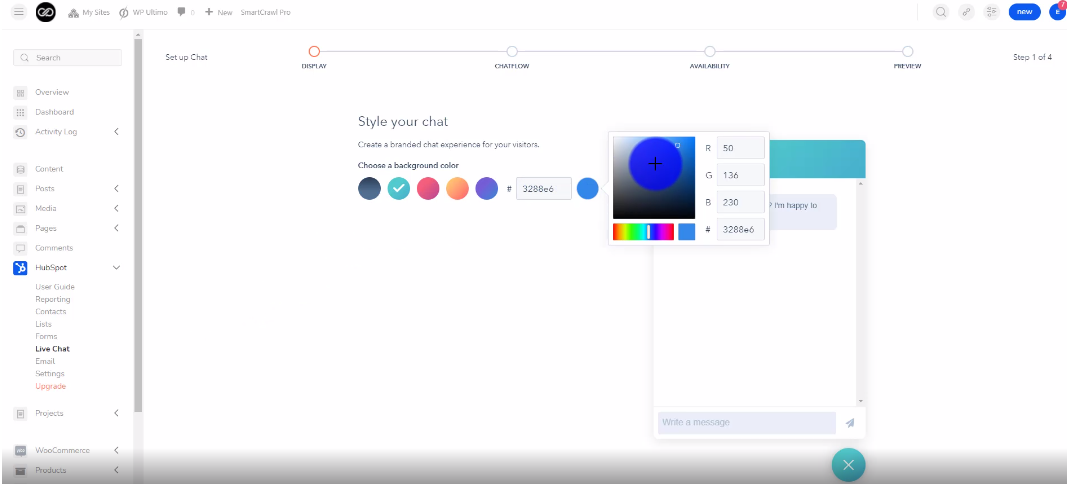
The next thing you're going to do is add your chat color background. Then click next.
Step 5: Enter your business hours
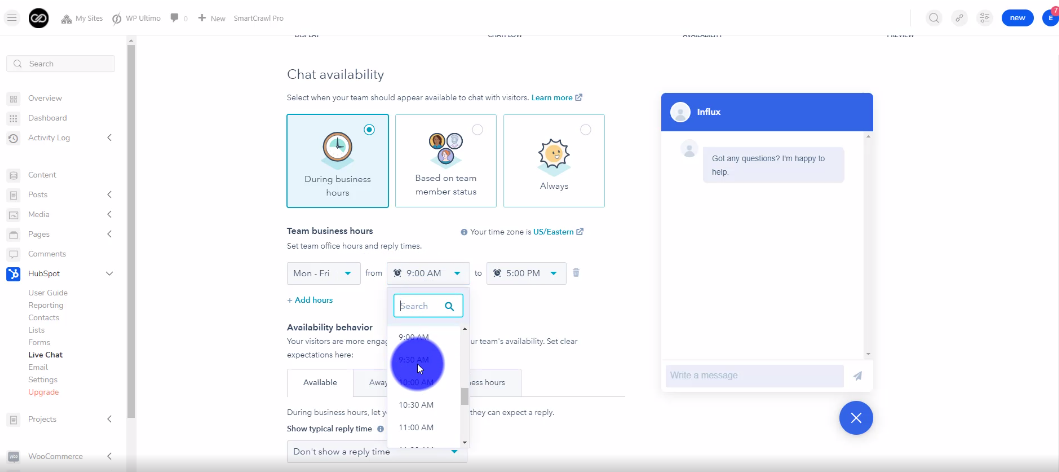
Now you're going to enter your business hours. Then, click next
Step 6: Preview your chat
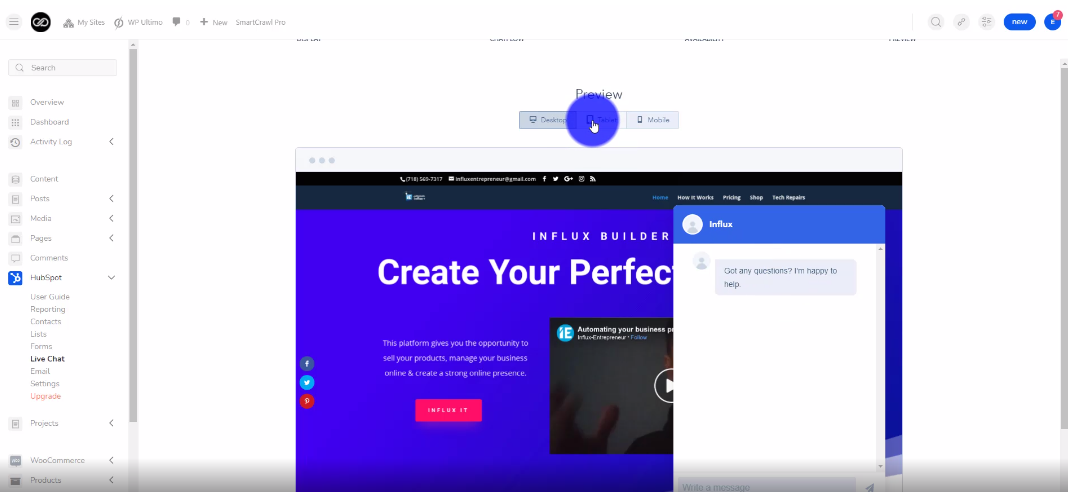
Next You're going to preview your chat. Then, click publish.
Step 7: View Your Live Chat
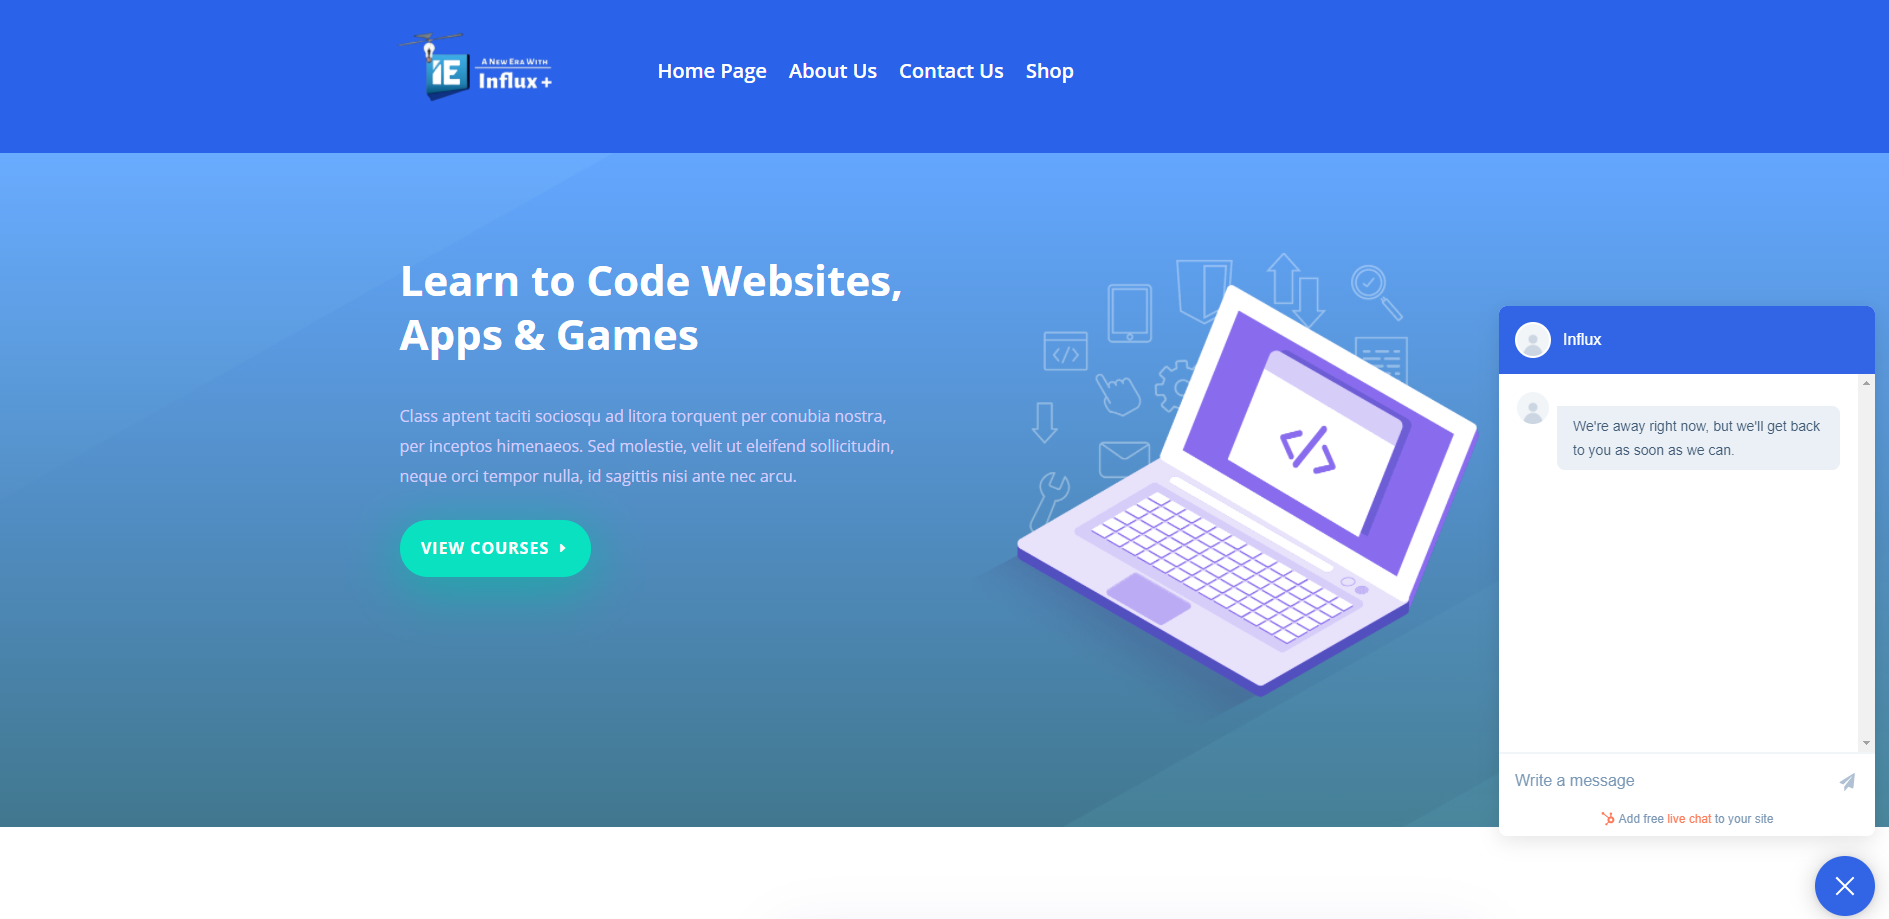
The last step is to go to your website and view your live chat option.
There you guys have it. That was a quick tutorial on how to add a live chat option to your website using HubSpot on the Influx Network. To Join influx plus click here
