How to create a menu on Influx Plus
Introduction
Hey Team Influx, today we are going to be showing you guys how to create a menu for your website on Influx Plus. What is a menu? A menu is a series of linked items that serve in navigating between the different pages of a website.
Step 1: Login To Your Dashboard

The first thing you’re going to do is sign into your website. To sign in to your website use this link: www.influxentrepreneur.com/clientarea
If you are not a part of the influx network, you can join by clicking here.
Step 2: Go to the menu
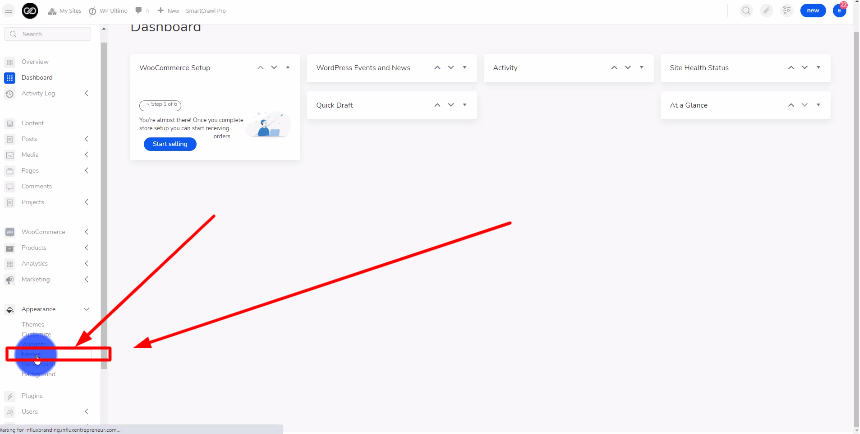
The next thing you’re going to do is look on the left-hand side and click on Appearance. Then click on Menus.
Step 3: Name Your Menu

Now, you’re going to go to where it says Menu Name and name your menu. Then click on the blue create menu button.
Step 4: Select the pages for the menu
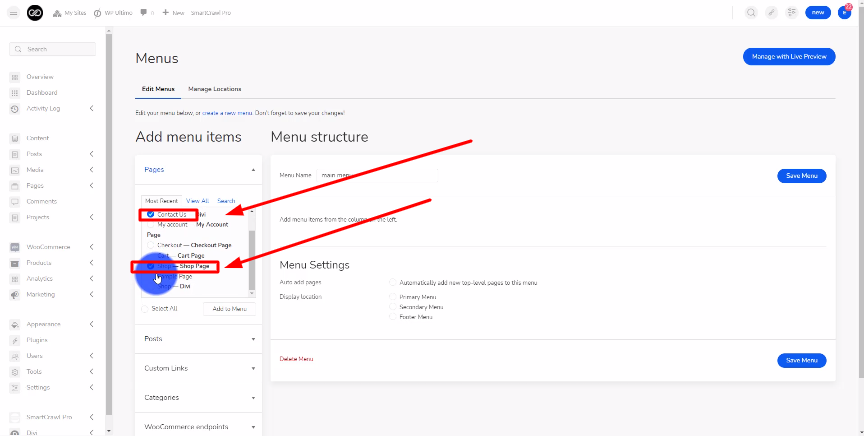
Then, on the left-hand side, you’re going to select the pages you want to add to the menu.
Step 5: Click the Add to Menu button
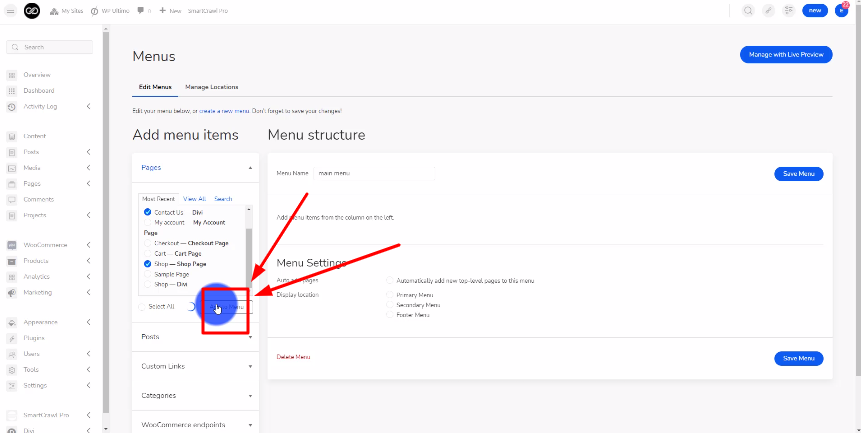
After selecting the pages, you’re then going to click on the Add to Menu button like shown in the screenshot above.
Step 6: Save the menu
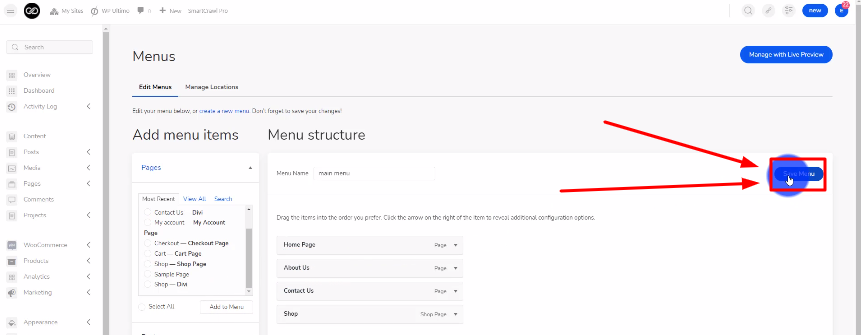
Now, you’re going to go to the right-hand side and click on the Save Menu button to save your menu.
Step 7: Go to manage location
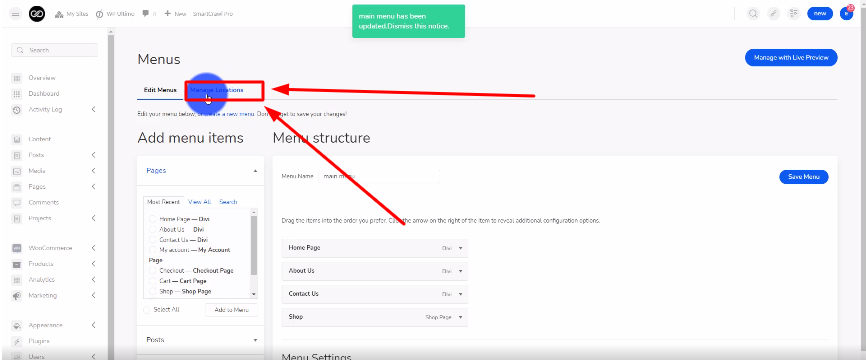
Then go to the top and click on Manage location.
Step 8: Select the menu you just made
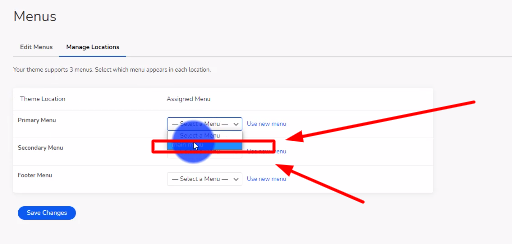
Select the menu you just made. Then click on the blue Save Changes button.
Conclusion
There you guys have it. That was a quick tutorial on how to create a menu on Influx Plus. To Join influx plus click here
