How To Set Up A Funnel Using Cartflows On Influx Plus
Introduction
Hey Team Influx, today we are going to be showing you guys how to set up a funnel using Cartflows on Influx Plus. A funnel helps attract new prospects and can increase sales.
Step 1: Login To Your Website

The first thing you’re going to do is log in to your dashboard. If you are not a part of the influx network join by clicking here
Step 2: Go to the plugins
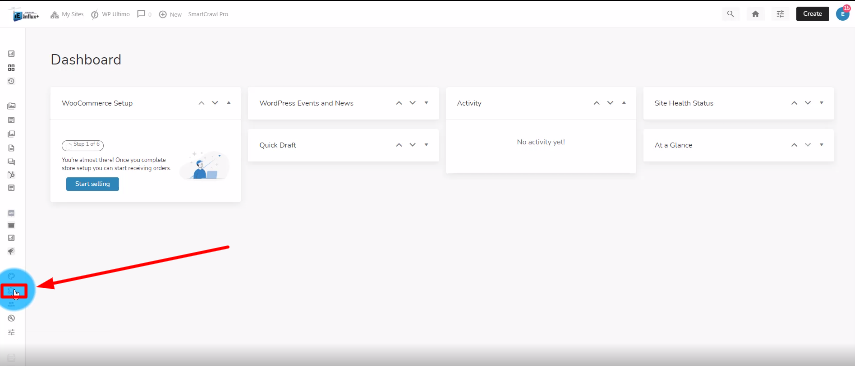
Now, you’re going to click on the puzzle icon to get to your plugins.
Step 3: Search for Cartflows
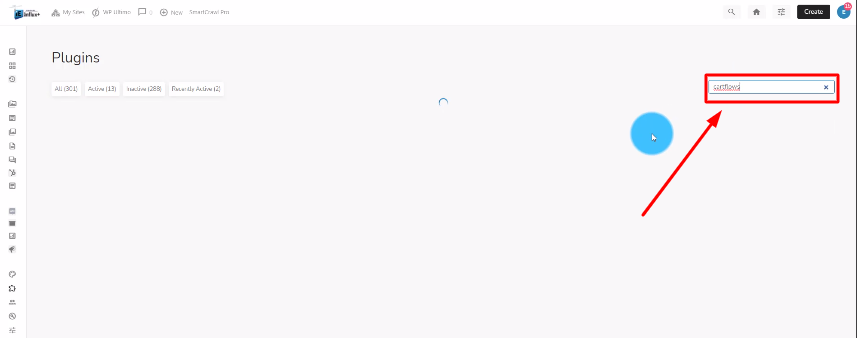
The next thing you’re going to do is search for Cartflows in the search box.
Step 4: Activate Cartflows
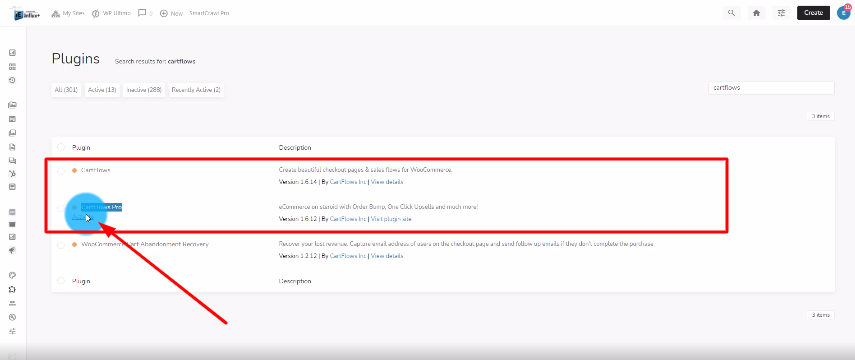
Now, you’re going to click on activate for the Cartflows and Cartflows Pro like shown in the screenshot above.
Step 5: Go to Cartflows
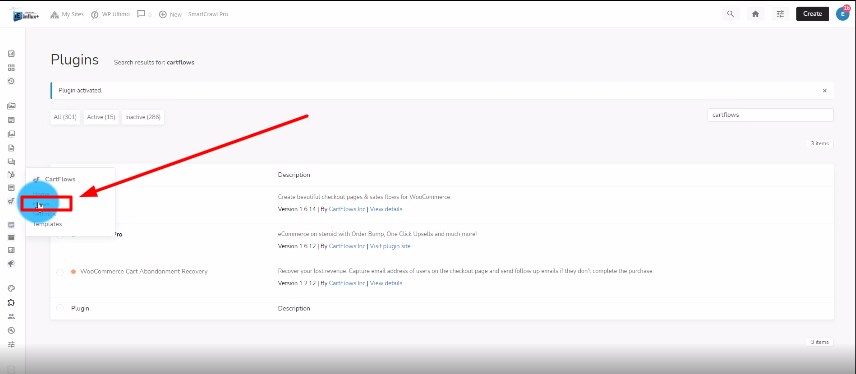
After that’s activated, go to the flows section of cartflows.
Step 6: Add a new cartflow
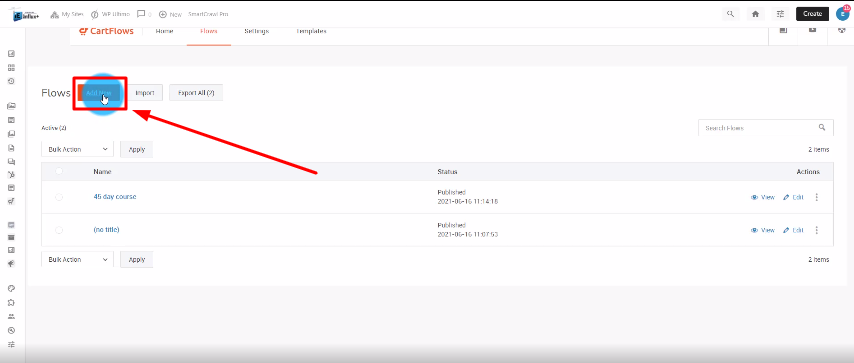
Once you’re on the flows, you need to click on the orange button that says Add New.
Step 7: Choose a template
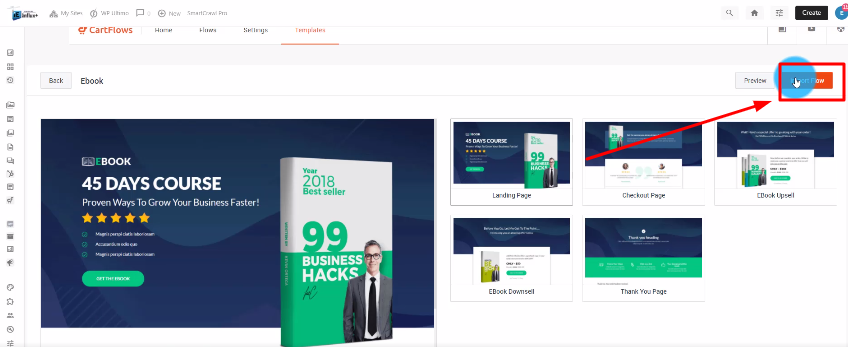
Once you choose a template that you like, click on the orange button that says Import Flow.
Step 8: Name your flow
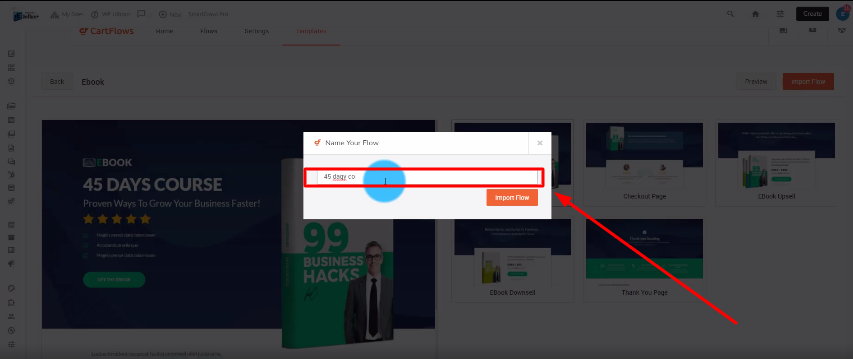
Now, you’re going to give your flow a name.
Step 9: View your landing page
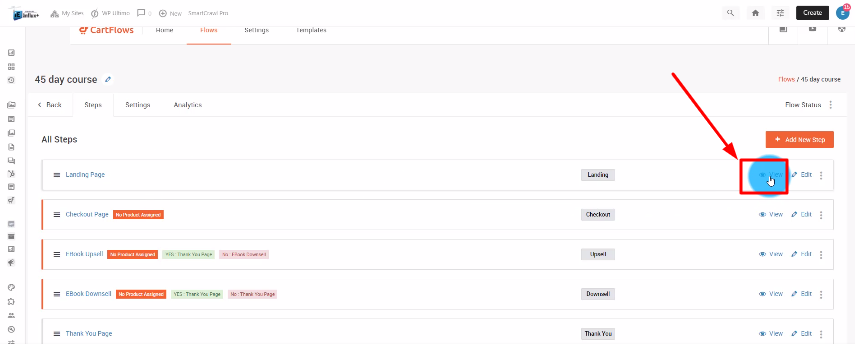
After the flow is imported, you’re going to click on View. To view and edit your landing page.
Step 10: Click on enable visual builder
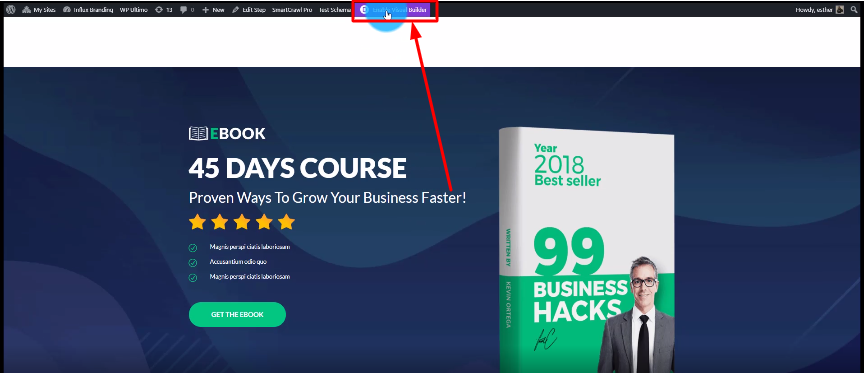
After the flow is imported, you’re going to click on View. To view and edit your landing page.
Step 11: Customize your page to your liking
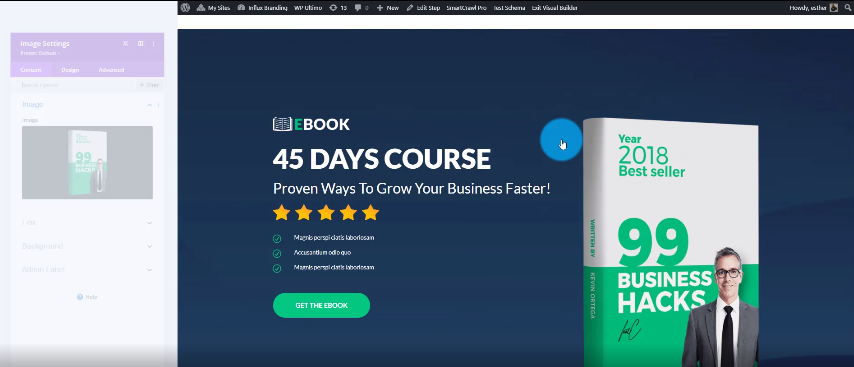
Now it’s time for you to start customizing your page. Customize your page as much as you want.
Step 12: Edit your checkout
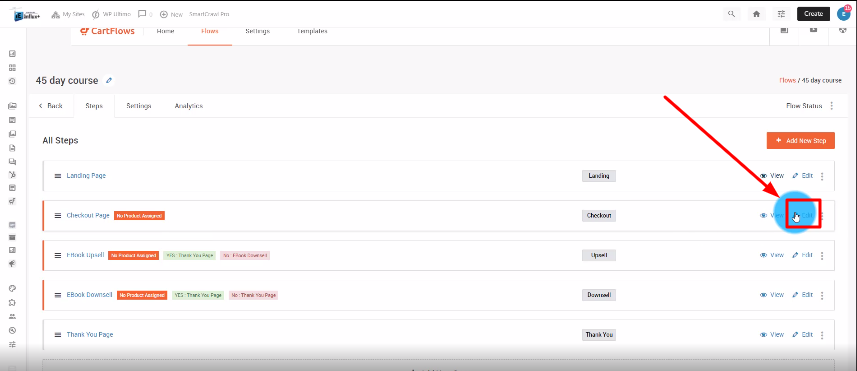
Once you are done customizing your pages, go back to the Cartflows. Then, on the checkout page, click on Edit.
Step 13: Click on the products tab
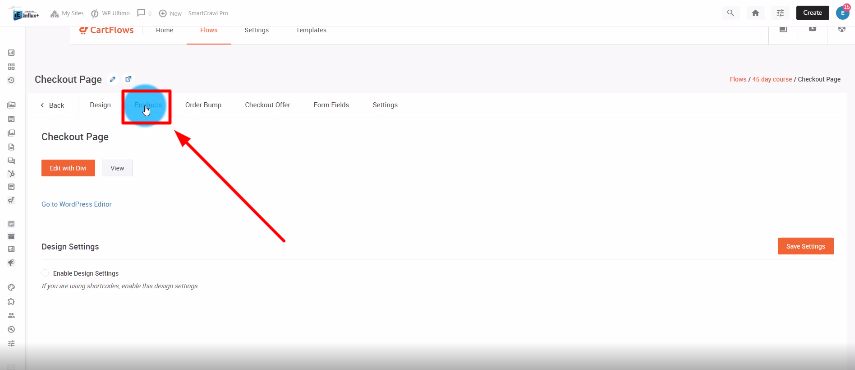
After that, click on the products tab.
Step 14: Add new product
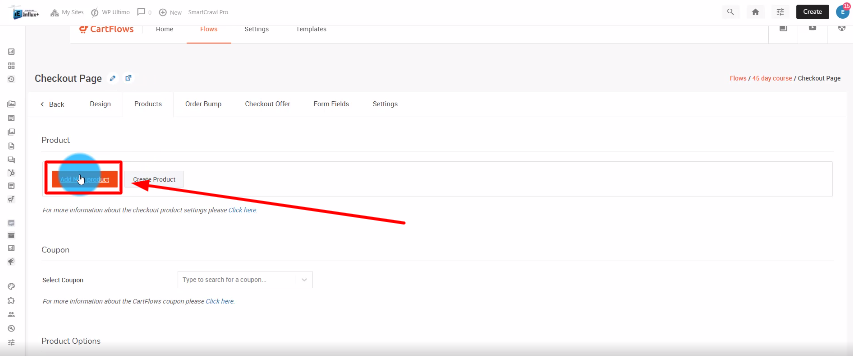
Here is where you will be able to assign a product to your funnel. Click on the Add New Product button.
Step 15: Search for your product
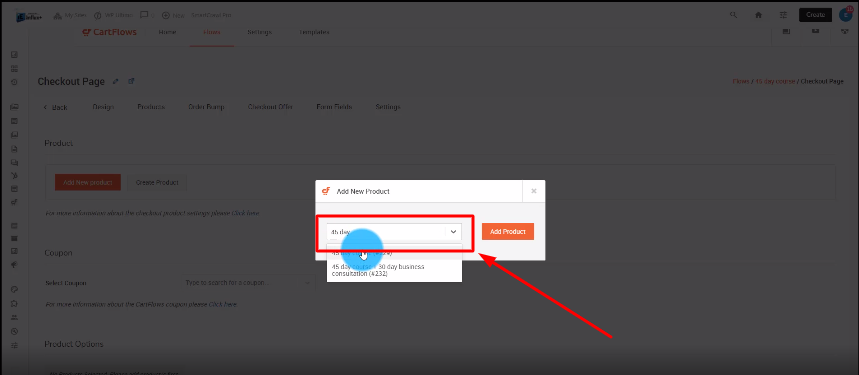
Search for your product. You must have already created a product on your site to be able to assign the product to this funnel.
Step 16: Save your changes
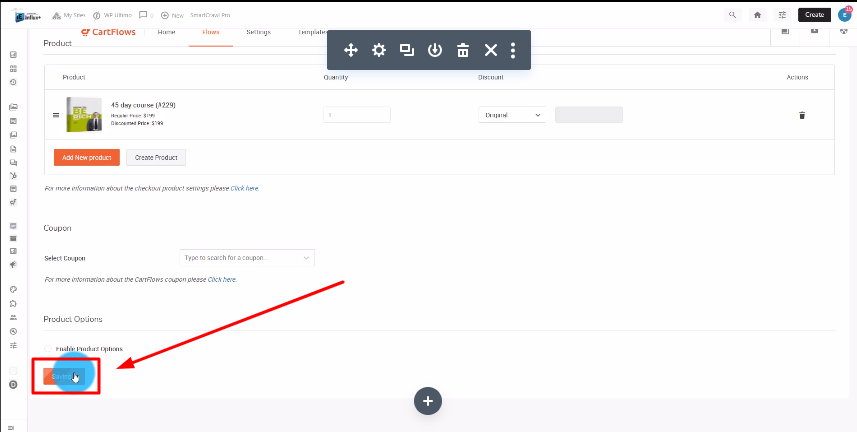
After that, scroll to the bottom and click on the orange button that says Save.
Step 17: Repeat steps 12-16 for the upsell and downsell
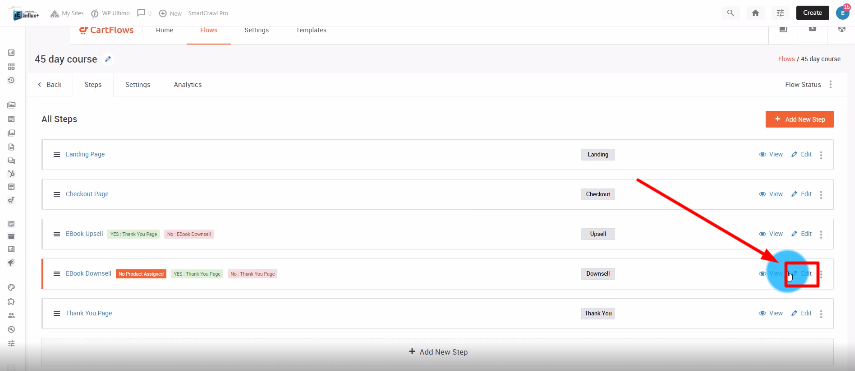
Repeat steps 12-16 for the upsell and downsell. Make sure you add the right products for each section.
Conclusion
There you guys have it. That was a quick tutorial on how to set up a funnel using cartflows on Influx Plus.
**To Join influx plus click here**
