How To Add An Email Opt-in Using HubSpot on Influx Plus
How To Add An Email Opt-in Using HubSpot on Influx Plus
Hey Team Influx, today we are going to be showing you guys how to add an email opt-in using HubSpot on the Influx Network. Please watch this quick and simple step-by-step on how to connect an email opt-in using HubSpot on the Influx Network.

The first thing you’re going to do is log in to your dashboard. If you are not a part of the influx network join by clicking here
Step 2: Go to your HubSpot lists
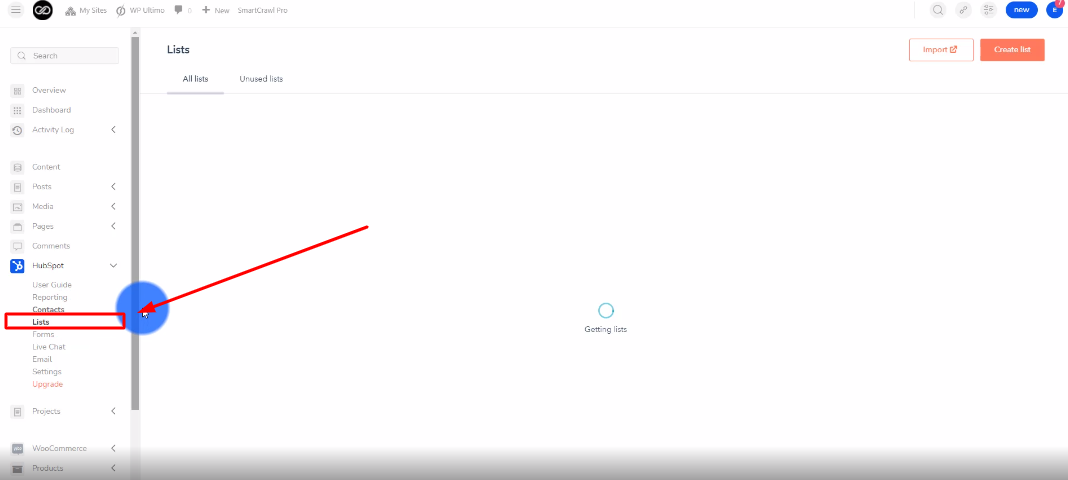
The next thing you’re going to do is go to the HubSpot Lists. Then, click on create list.
Step 3: Name Your List
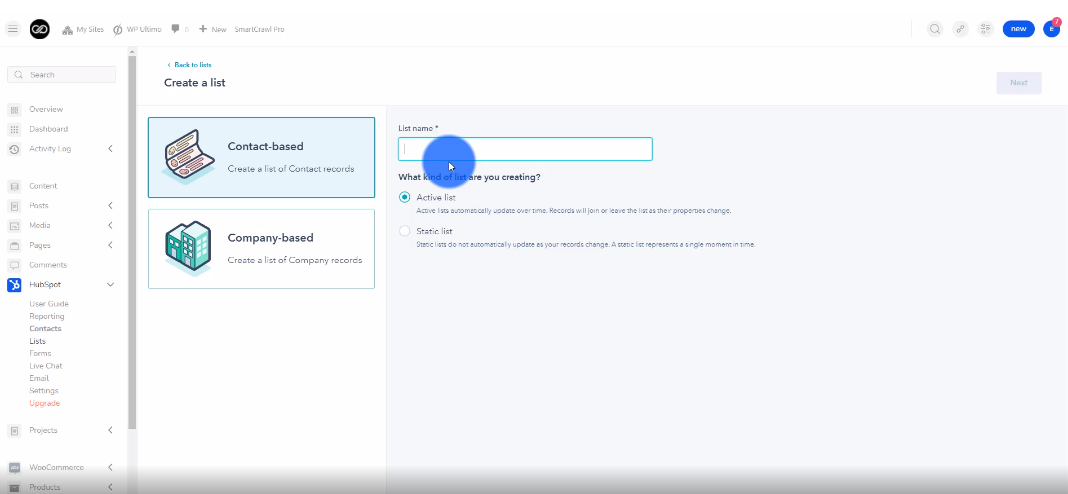
The next thing you’re going to do is name your list.
Step 4: Select Static List
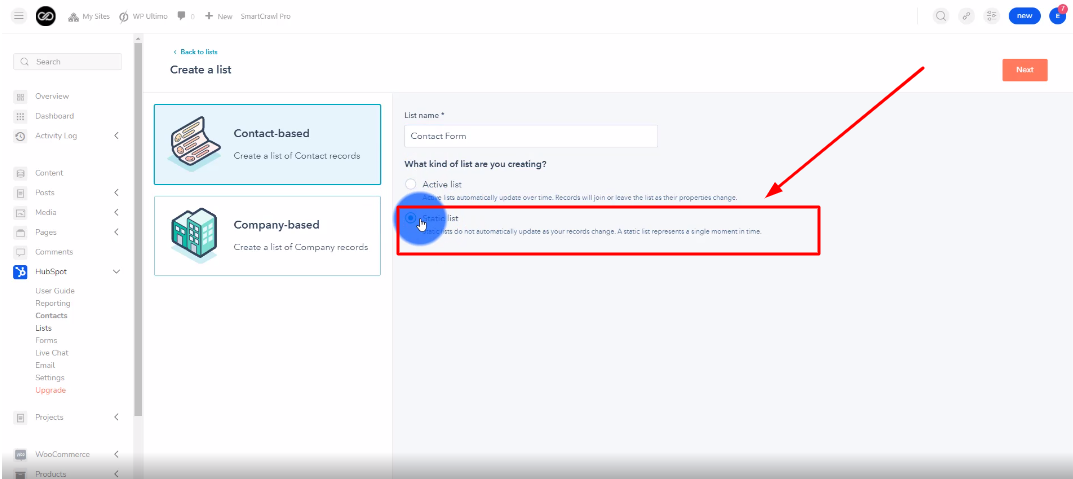
The next thing you’re going to do is select static list. Then, click next.
Step 5: Select Form Submissions
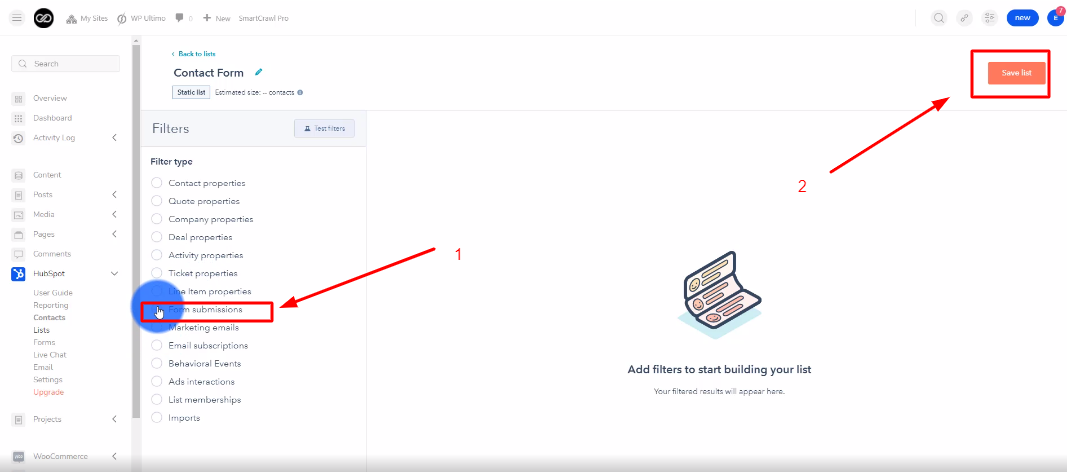
Now you’re going to select Form Submissions under Filter types. Then, click save list.
Step 6: Add The Email Opt-in Module
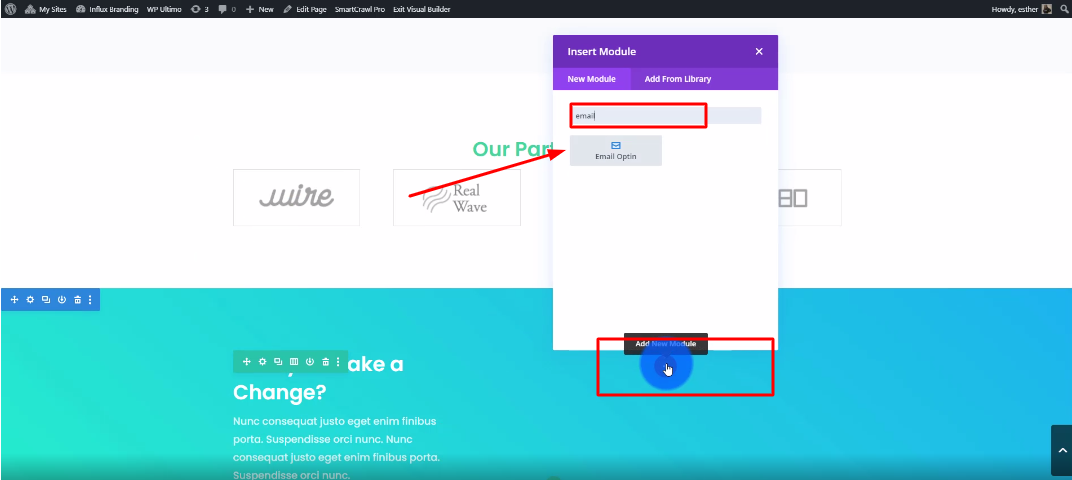
Next, you’re going to add your email opt-in module to the page.
Step 7:Customize your email opt-in
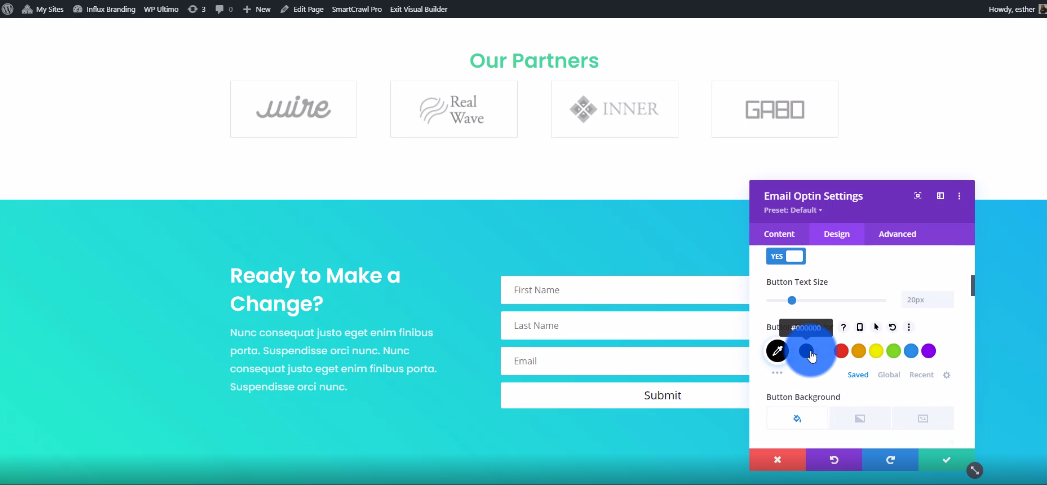
Now you’re going to customize your email opt-in to your liking.
Step 8: Go To Content then click on Email Account
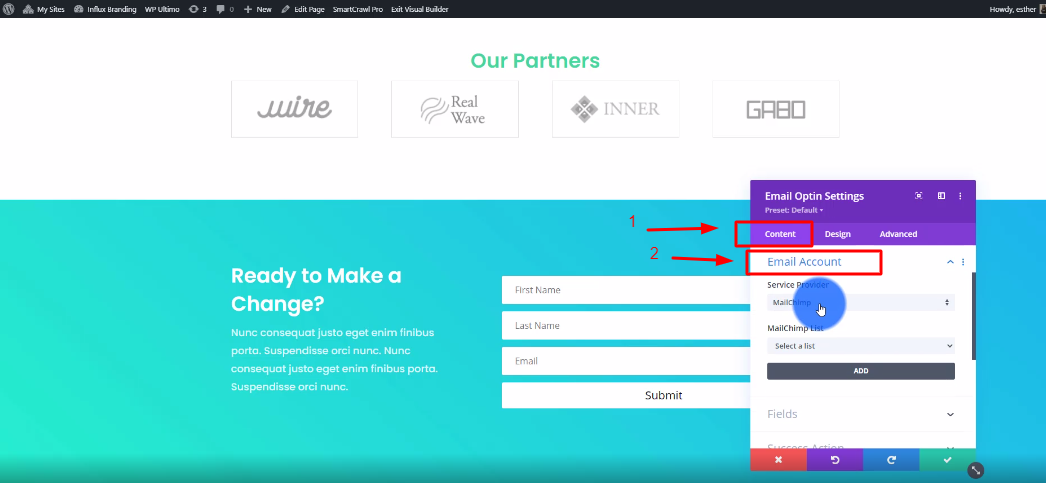
Once you are done customizing, go back to Content and click on Email Account.
Step 9: Select HubSpot
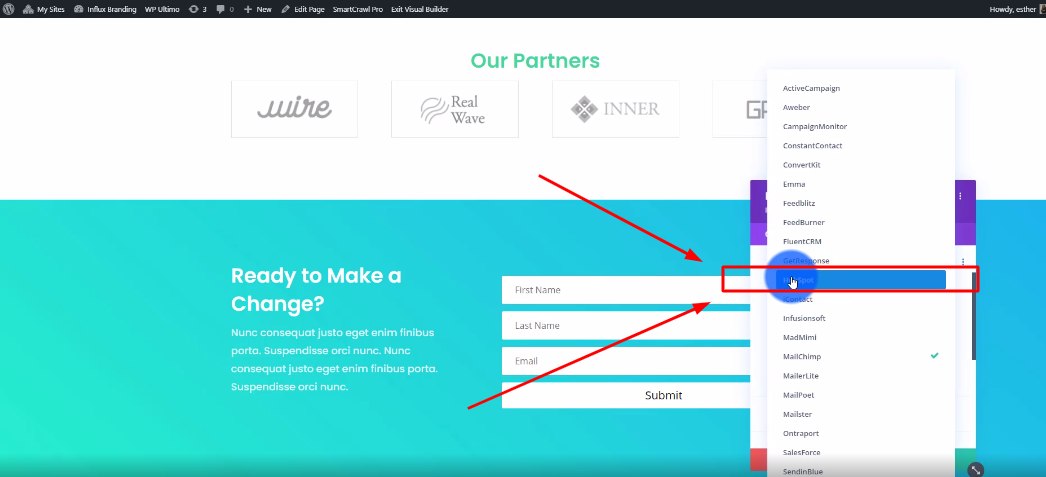
Now, under the Mailchimp List section, select HubSpot.
Step 10: Enter your account name & API Key
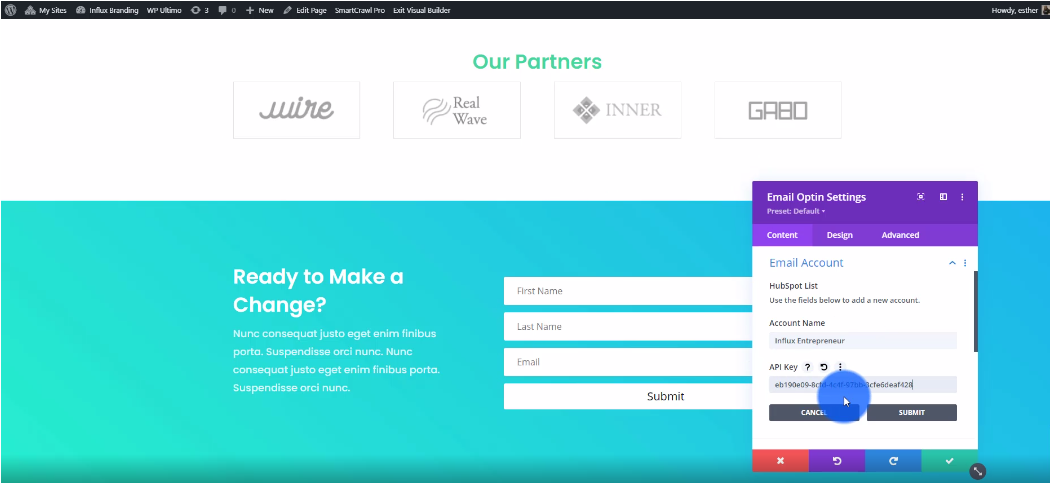
Now, enter your account name and enter your API Key. The API key can be found in your HubSpot account settings.
There you guys have it. That was a quick tutorial on how to add an email opt-in to your website using HubSpot on the Influx Network. To Join influx plus click here
